Desserts
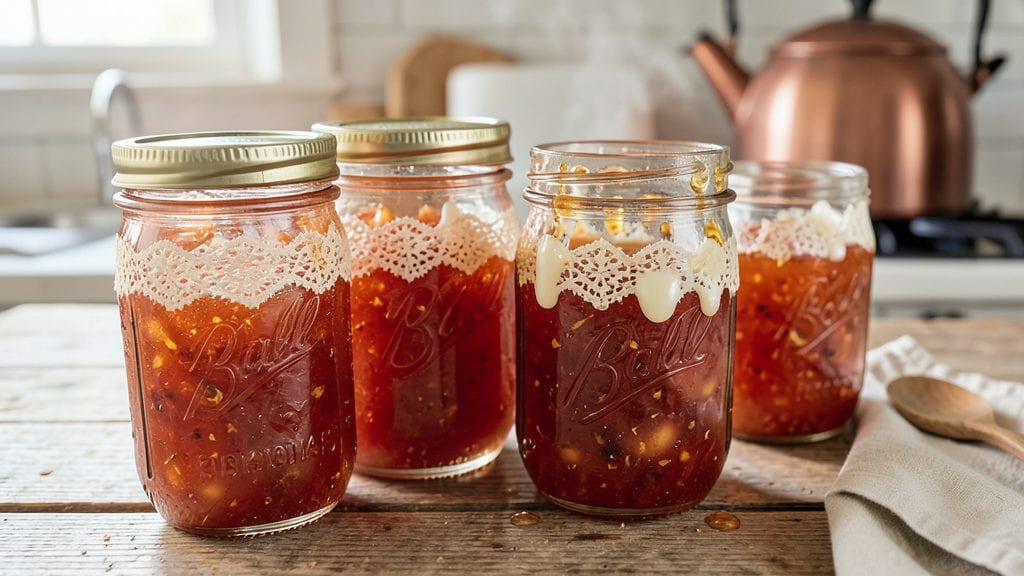
Making apple pie jam that captures the essence of a warm, spiced dessert is simpler than you think, and canning it ensures you’ll have that nostalgic flavor all year round.
The key lies in balancing tart apples with just enough sugar and a touch of cinnamon to evoke that classic pie aroma. I’ve perfected this recipe through years of testing—no pectin required, just precise ratios and proper sterilization for safe, long-lasting preserves.
This recipe transforms seasonal apples into a thick, velvety jam with a perfect set, ready to spread on toast, stir into yogurt, or drizzle over pancakes. The process is straightforward: cook down the fruit until it breaks down, then carefully package it in sterilized jars for storage.
With just five simple ingredients—apples, sugar, lemon juice, cinnamon, and vanilla—you’ll achieve a jam that tastes like it came straight from a bakery.
The result is a jam with deep apple flavor, a glossy sheen, and a texture that’s neither too runny nor too stiff—just right for spreading. Each batch yields about four 8-ounce jars, enough to gift or enjoy throughout the year.
The cinnamon and vanilla add warmth, while the lemon juice brightens the natural sweetness of the fruit, creating a preserve that truly tastes homemade.
Whether you’re preserving summer’s bounty or craving a taste of autumn, this apple pie jam is versatile enough for breakfast, desserts, or even savory dishes like glazed ham. Let’s get started—your pantry will thank you later.
Ingredients for apple pie jam canning
Five simple ingredients transform tart apples into nostalgic, spiced jam perfect for canning.
| Ingredient | Amount | Notes |
|---|---|---|
| Apples 🍎 | 4 lb | Tart varieties like Granny Smith |
| Granulated Sugar 🍚 | 3 cups | White or raw cane preferred |
| Lemon Juice 🍋 | ½ cup | Freshly squeezed from 2-3 lemons |
| Ground Cinnamon 🌿 | 1 ½ tbsp | Freshly toasted for deeper flavor |
| Pure Vanilla Extract 🍯 | 1 tsp | High-quality, not imitation |
| Water 💧 | ½ cup | For sterilizing jars and lids |
| Ball or Mason Jars 🥫 | 4 whole | 8-ounce size for proper storage |
| Lid Bands 🔗 | 4 whole | New for each jar sterilization |
The apples are everything—Granny Smith or Braeburn work best for that tart kick. Local farmers markets often have perfect seasonal varieties, or grab a mix from the grocery store's produce section. I always peel and core them first—no need for seeds or stems, just chop into even chunks. For sugar, raw cane or organic white both work, but avoid powdered sugar. The lemon juice? Fresh is non-negotiable—bottled just won't cut it. If you're worried about waste, save the leftover peels and zest for homemade cleaning products or infused oils.
No Granny Smith apples? McIntosh or Honeycrisp will work in a pinch, though they're slightly sweeter. Running low on vanilla extract? Vanilla bean paste gives you seeds plus extract, or use vanilla sugar at double the amount (but skip the extra extract). The cinnamon can be swapped for cinnamon sticks—just remove them before canning. For sterilizing jars, boiling water works perfectly—no need for fancy equipment. And if you're short on jars, clean glass jars from pasta sauce or pickles** work as long as they're properly sterilized.
This jam keeps beautifully—1 year unopened in a cool, dark pantry—and tastes even better after a few weeks. Once opened, store in the fridge for 3-4 months. I always label my jars with the date using a permanent marker—trust me, you'll forget. For gifting, tie a ribbon around the lid band—it looks professional and hides any imperfections. The first batch always disappears fastest, so make extra. Freezing is an option too—just leave 1/2-inch headspace and freeze for up to 6 months**.
Why You'll Love This Recipe
- No Chopping Needed: I’ll admit, I used to dread peeling and dicing apples for jam—until I discovered this recipe. You just toss in whole apples (peeled or not, your call) and let the slow cooker do the work while you sip coffee.
- Taste Like Fall: That perfect balance of sweet apples, warm cinnamon, and a whisper of vanilla? It’s the kind of flavor that makes you pause mid-spoonful, like biting into a classic pie but better. The lemon juice keeps it bright—no mushy, cloying aftertaste here.
- Gifts That Keep Giving: Between us, homemade jam is the ultimate hostess gift—elegant, personal, and actually useful. I’ve given jars to neighbors, teachers, and my mom, and every time, they ask for more. Plus, it’s way cheaper than store-bought.
- Pantry Magic: A few jars of this jam turn into toast toppings, yogurt swirls, or even a quick glaze for pork chops. I’ve had it last me all winter, and the sugar helps it keep beautifully. Honestly, it’s the kind of recipe that pays for itself.
Step-by-step instructions for apple pie jam canning recipe
Here's how to transform fresh apples into fragrant, spiced preserves that taste like a slice of warm apple pie.
Prepare and Sterilize Your Equipment
Fill a large pot with enough water to cover the bottom of a 4 whole Ball or Mason Jars by about 2 inches. Bring to a rolling boil, then add the 4 whole Lid Bands and let them boil for 10 minutes. Meanwhile, wash the jars and lids with hot, soapy water, then rinse thoroughly. Keep both jars and lids hot until ready to use—this prevents contamination and ensures proper sealing.
I like to use a jar lifter to carefully remove the sterilized jars from the boiling water and place them upside down on a clean kitchen towel. This keeps them hot while you prepare the filling. The key here is maintaining a sterile environment—any bacteria or mold spores could ruin your hard work and create unsafe preserves.
Peel, Core, and Chop the Apples
Peel the 4 lb Apples using a vegetable peeler or sharp paring knife, removing all skin and any blemishes. Cut each apple into quarters, then remove the cores using an apple corer. For even cooking, slice each quarter into ¼-inch thick pieces—this ensures they soften uniformly without turning mushy.
As you work, I recommend keeping a bowl of cold water nearby. Dip each apple slice into the water for 30 seconds before draining and adding to your cooking pot. This helps preserve the color and prevents the apples from browning prematurely. The fresher the apples, the brighter your final jam will be.
Cook the Apple Mixture to Softness
In a large, heavy-bottomed pot, combine the prepared apple slices with 3 cups Granulated Sugar, 0.5 cup Lemon Juice, and 1.5 tbsp Ground Cinnamon. Stir gently to distribute the spices evenly. Bring the mixture to a boil over medium-high heat, then reduce the heat to medium-low and let it simmer uncovered for 20-25 minutes, stirring occasionally.
You'll know it's ready when the apples are completely tender and the mixture thickens noticeably. The texture should coat the back of a spoon but still flow smoothly. This stage is critical—if you rush it, the jam won't set properly in the jars. Taste a spoonful; the sweetness should balance perfectly with the tart apples and warm spices.
Finish with Vanilla and Prepare for Canning
Remove the pot from heat and stir in the 1 tsp Pure Vanilla Extract. Let the mixture cool for 5 minutes to allow the vanilla to infuse fully. While it cools, use a clean funnel to ladle the hot jam into the sterilized 4 whole Ball or Mason Jars, filling each to within ¼ inch of the rim. Wipe the jar rims with a clean, damp cloth to remove any jam residue.
Here's the thing—don't tap the jars or tilt them when filling. This can create air bubbles that prevent proper sealing. Instead, gently pour the jam straight down the side of each jar. The vanilla adds a subtle depth that makes this jam taste like it came straight from a bakery. Once filled, place the lids on the jars and screw the bands down fingertip-tight.
Process the Jars for Safe Preservation
Place the filled jars into a canning pot or large pot with a rack at the bottom. Add enough hot water to cover the jars by 1 inch. Bring the water to a gentle boil, then process the jars for 10 minutes at 0-1,000 feet elevation. The water should maintain a steady simmer—not a rolling boil—throughout the entire processing time.
After processing, carefully remove the jars using a jar lifter and place them on a clean towel. Let them cool undisturbed for 12-24 hours. You'll hear a satisfying "ping" as the lids seal. To test, press the center of each lid—if it doesn't pop up, it's sealed properly. Any jars that don't seal should be refrigerated and used within 2 weeks. Properly sealed jars will keep in a cool, dark place for up to 1 year.
Pro Tips For Making Apple Pie Jam Canning
- Peel Apples First: I learned this the hard way—peeling apples after cooking turns your jam into a mushy, sad mess. The skin adds texture and keeps the chunks intact, but it’s a nightmare to peel after simmering. Do it raw, even if it’s tedious. Trust me, your jam will thank you.
- Use Pectin Early: If your jam isn’t setting properly, you’re probably waiting too long to add the pectin. Toss it in with the sugar and lemon juice right at the start—this is the thing that matters most for that perfect spreadable consistency. No last-minute fixes here.
- Simmer Low and Slow: High heat turns apple pie jam into syrup faster than you can say “canning failure.” Keep it at a steady simmer—small bubbles, gentle rolling. I used to rush it, and my jam always ended up too thin. Patience here guarantees thickness.
- Skip Pre-Measured Vanilla: Drizzle that vanilla extract in at the very end—after the jam has cooled just enough to take the heat. Pre-measuring it into the pot means it’ll cook off completely, leaving you with jam that tastes like sugar and apples. A splash of cold extract makes all the difference.
Serving suggestions for apple pie jam canning
Breakfast Spreads
This jam is a game-changer for morning routines. Spread a thick layer on toasted sourdough or brioche for a buttery-sweet contrast that pairs perfectly with Greek yogurt or ricotta cheese. I love adding a swirl of honey or drizzling with warm maple syrup for extra decadence.
For a protein boost, top with granola or chopped nuts—the cinnamon in the jam adds warmth that cuts through the crunch. 🍯
Dessert Pairings
Warm up a slice of homemade pie crust or store-bought shortbread cookies and top with a dollop of this jam. The spiced apple flavor reminds me of classic apple pie, but with the convenience of a spread.
For a fancy touch, serve with vanilla ice cream or whipped cream—the tartness balances the sweetness beautifully. I also love using it as a filling for thumbs-up cookies or mini apple tarts.
Savory Applications
Don’t let the sweetness fool you—this jam shines in savory dishes too! Glaze roasted pork chops or ham steaks with a thin layer of warmed jam for a caramelized finish. The cinnamon and vanilla add depth that complements pork perfectly.
I also use it as a glaze for grilled chicken thighs or as a filling for stuffed mushrooms. The acidity from the lemon juice cuts through rich meats beautifully. 🍗
Gifting and Presentation
For a thoughtful gift, tie a red ribbon around the jar lid and attach a handwritten tag with the date. I often include a small note about how to use it—like "Perfect for toast or glazing ham!"—to inspire the recipient.
If giving multiple jars, bundle them with a wooden cutting board or spoon for a complete gift set. The jam’s vibrant color and spiced aroma make it a standout centerpiece on any kitchen shelf.
Global Twists
Get creative with international flavors! Stir a spoonful into chai tea for a cozy drink, or mix it with mashed sweet potatoes for a warm side dish. In Scandinavian cuisine, it’s often paired with lingonberry jam for a tart-sweet combo.
For a Middle Eastern touch, serve with labneh and za’atar—the cinnamon bridges the gap between sweet and savory beautifully. The possibilities are endless! 🌍
Nutrition facts
Frequently asked questions
Why does my apple pie jam turn out too runny?
Runny jam usually means the apples weren't cooked long enough or the sugar ratio was off. For proper thickness, cook the mixture until it reaches a 220°F temperature (use a candy thermometer) and ensure you're using 3 cups sugar per 4 lbs apples. Stirring occasionally helps prevent scorching, which can also affect texture. If it's still too thin after cooking, simmer uncovered for 5-10 extra minutes to reduce it further.
Can I use frozen apples instead of fresh?
Yes, but thaw and drain them first! Frozen apples work well, but they release more liquid during cooking. Use 4 lbs thawed apples (about 5 lbs frozen) and add 1 extra tablespoon of lemon juice to balance the moisture. The texture will be slightly softer, but the flavor remains rich. Just be sure to peel and chop them before freezing to save time.
How do I fix moldy spots in my sealed jars?
If you spot mold after opening a sealed jar, discard the entire contents immediately—mold can produce toxins even if the jam looks mostly fine. To prevent this, always check for proper sealing (press the lid center—it shouldn't pop up) and store jars in a cool, dark place. If jars seal but develop mold later, it means they weren't sterile enough during processing. Next time, boil lids for 10 minutes and process jars for the full 10 minutes at 0-1,000 feet elevation.
What can I do with extra jam that didn't seal properly?
Unsealed jars are safe to use if refrigerated within 2 weeks. Spread it on toast, stir into oatmeal, or use as a glaze for meats. For a quick fix, reheat the jam in a pot, ladle into a clean jar, and refrigerate for up to 3 months. You can also freeze it in small containers for 6 months—just leave ½-inch headspace to prevent freezer burn. The flavor won't change, just the texture slightly.
Can I adjust the sweetness level?
For a less sweet jam, reduce sugar to 2½ cups and add ½ cup apple cider to compensate. For extra sweetness, increase sugar to 3½ cups and reduce water by 2 tablespoons. Taste as you cook—adjust in ¼-cup increments until balanced. The cinnamon and vanilla will still shine through, but the tartness may need extra sugar if using very sweet apples like Gala.