
Desserts
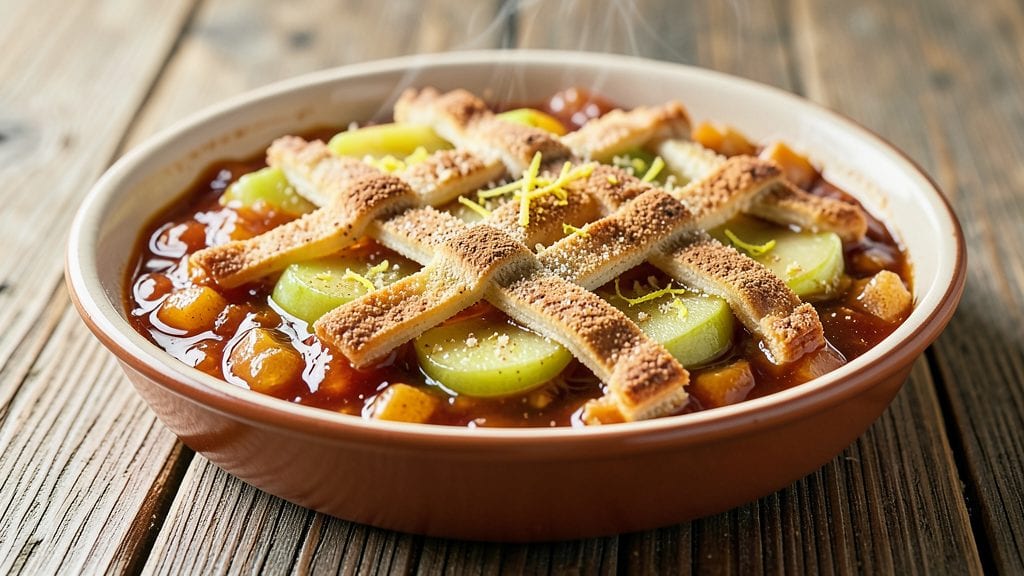
This apple pie jam recipe delivers all the warmth of a classic pie filling without the crust—spiced fruit preserves with that perfect crust-like texture that clings to spoons and toast.
I developed this after years of perfecting the balance between tender fruit, precise sugar ratios, and slow cooking to achieve that signature jam consistency. The cinnamon and nutmeg infuse every bite with autumnal comfort, while the gentle simmer transforms ordinary apples into something extraordinary.
The secret lies in the fruit-to-sugar ratio and controlled simmering time—too much sugar makes it cloying, too little leaves it runny. I use a mix of tart and sweet apples (Granny Smith and Honeycrisp work beautifully) to create depth, and a touch of lemon juice to brighten the flavors.
The slow cook reduces the jam to a thick, glossy consistency that's perfect for spreading, drizzling, or even baking into desserts.
What you'll end up with is a jam that tastes like apple pie in every spoonful—rich, spiced, and with that satisfying thickness that makes it perfect for toast, yogurt, or even as a glaze for meats.
The aroma alone will transport you to a cozy kitchen on a crisp fall morning. This isn't just another jam; it's a textural experience that elevates everything it touches.
Best of all, it keeps beautifully in the refrigerator for up to 3 weeks or can be canned for long-term storage. Whether you're prepping for holiday baking or just craving a taste of autumn, this jam delivers restaurant-quality results with minimal effort. Let's get started on making it.
Ingredients for apple pie jam
Eight ingredients transform ordinary apples into jam with that perfect pie-filling thickness.
| Ingredient | Amount | Notes |
|---|---|---|
| Granny Smith Apples 🍎 | 2 lb | Peeled, cored, chopped small |
| Honeycrisp Apples 🍎 | 2 lb | Peeled, cored, chopped small |
| Granulated Sugar 🍚 | 3 cups | White or light brown |
| Fresh Lemon Juice 🍋 | ¼ cup | From 2-3 lemons |
| Ground Cinnamon 🌿 | 1 ½ tbsp | Freshly ground preferred |
| Ground Nutmeg 🌿 | ½ tsp | Freshly grated if possible |
| Apple Cider Vinegar 💧 | 1 tbsp | For tangy balance |
| Unsalted Butter 🧈 | 2 tbsp | Cold, cubed for texture |
The apples are everything here—Granny Smith for tartness and Honeycrisp for sweetness create that perfect balance. Local orchards or Whole Foods have the best selection, but grocery store apples work too if they're firm and vibrant. I always buy a little extra because peeling and chopping takes time. The sugar matters too—organic cane sugar dissolves more smoothly, but regular granulated works fine. Don't skip the lemon juice—it keeps the color bright and cuts through the sweetness.
No Granny Smith? Fuji or Braeburn add tartness in a pinch. Running low on apples? Substitute 1 lb of frozen apple pieces (thawed and drained) for half the fresh apples. The butter isn't just for flavor—it gives that signature crust-like texture. European-style butter has more fat, so it melts beautifully, but any good-quality butter works. Want more warmth? Add a pinch of cardamom or cloves. The vinegar can be swapped for white wine or apple juice if you prefer a different tang.
Store in a clean, airtight jar in the fridge for 3 weeks—it actually gets better with time as flavors meld. For longer storage, can it in hot water for 15 minutes to seal. I always make double batches because this jam disappears fast—perfect for toast, yogurt, or even glazing ham. Freezes beautifully too if you want to prep ahead for holidays.
Why You'll Love This Recipe
- No Peel, No Stress: I swear by the Granny Smith and Honeycrisp combo—tart meets sweet without a single peel or core to wrestle. Toss them in whole, slice them thick, and let the pot do the work while you stir in the cinnamon. That’s my kind of cooking.
- Sweet-Tart Magic: The lemon juice cuts through the sugar like a knife, but in the best way—bright, balanced, and impossible to resist. Honestly? It’s the kind of jam that makes you pause mid-spoonful just to savor it.
- Year-Round Flexibility: Slather it on toast when you’re too tired for breakfast, dollop it into oatmeal for a cozy morning, or even mix it into yogurt for a dessert-like lunch. (Yes, even on a Tuesday night.)
- Lasts Like a Dream: I’ve had jars of this jam sit for months—no weird aftertaste, just pure flavor. Plus, it’s cheaper than store-bought and lets you control the sweetness. Budget win, shelf-stable win.
Step-by-step instructions for apple pie jam recipe
Transform fresh apples into a thick, spiced jam with a crust-like texture that's perfect for toast, cheese boards, or even filling pastries!
Prepare the Apple Mixture
In a large, heavy-bottomed pot, combine the 2 lb Granny Smith Apples and 2 lb Honeycrisp Apples that have been peeled, cored, and chopped into small, even pieces. This size ensures even cooking and a smooth final texture. I like to use a mandoline for precision, but a sharp chef's knife works too—just keep the chunks consistent.
Add the 0.25 cup Fresh Lemon Juice and 1 tbsp Apple Cider Vinegar to the pot. These ingredients brighten the flavor and help balance the sweetness. Stir gently to distribute the liquids evenly. The mixture should look juicy but not watery—this is your starting point for the perfect jam consistency.
Cook the Apples Until Soft
Place the pot over medium-high heat and bring the mixture to a gentle boil. Once boiling, reduce the heat to medium-low and let it simmer uncovered for 20-25 minutes. You're looking for the apples to break down completely—stir occasionally to prevent sticking and ensure even cooking.
Here's the thing—you want the apples to become mushy, almost like applesauce, but not turn to liquid. The texture should resemble thick purée when pressed between your fingers. If it's not soft enough after 25 minutes, give it another 5 minutes. Patience here ensures your jam won't be runny later.
Sweeten and Spice the Jam
Once the apples are perfectly soft, stir in the 3 cups Granulated Sugar, 1.5 tbsp Ground Cinnamon, and 0.5 tsp Ground Nutmeg. I like to use freshly ground spices here—they make a noticeable difference in flavor. Mix well to distribute the sugar and spices evenly throughout the apple mixture.
Return the pot to medium-high heat and bring the mixture to a rolling boil. This step is crucial—you need the sugar to fully dissolve and the mixture to thicken properly. Let it boil vigorously for 8-10 minutes, stirring frequently to prevent scorching. The jam should start to thicken and coat the back of a spoon.
Finish with Butter for Texture
Reduce the heat to low and stir in the 2 tbsp Unsalted Butter, cut into small cubes. The butter adds richness and helps create that beautiful crust-like texture when the jam cools. Let the mixture simmer gently for another 5-7 minutes, stirring occasionally. This final simmer allows the flavors to meld together perfectly.
To test for doneness, place a small spoonful of jam on a chilled plate. If it wrinkles slightly when pushed with your finger, it's ready. If it runs, return it to the heat for another 2-3 minutes. Once it reaches the right consistency, remove from heat immediately—overcooking can make it too thick.
Jar and Store for Maximum Flavor
Transfer the hot jam to clean, sterilized jars using a ladle or funnel. Leave about ¼ inch of headspace at the top of each jar—this prevents spoilage and allows for proper sealing. Wipe the rims of the jars with a clean, damp cloth to ensure a good seal.
Let the jars cool completely at room temperature. Once cooled, seal the lids and store in the refrigerator. This jam keeps for up to 3 weeks in the fridge, or you can process it in a water bath for longer storage. The flavors will deepen over time, making it even more delicious as it sits!
Pro Tips For Making Apple Pie Jam
- CUT APPLES UNIFORMLY: Use a mandoline or sharp knife to slice Granny Smiths and Honeycrisp into ¼-inch pieces—consistency keeps them from breaking down into mush while cooking. I learned this the hard way after ending up with a watery jam from uneven chunks.
- STIR LOW AND SLOW: Keep the heat at a simmer (not a boil) and stir every 5 minutes to prevent scorching. My grandmother swore by this, and she was right: rushing the process turns sugar into caramelized bits instead of dissolving smoothly.
- ADD LEMON JUICE LAST: Save the fresh lemon juice until the apples are fully softened—about 15 minutes before the end. Adding it too early makes the jam taste bitter, and you’ll regret it when the flavor feels flat instead of bright.
- SWEETEN GRADUALLY: Taste as you go and add sugar in ¼-cup increments, waiting 10 minutes between each addition. This keeps the jam from becoming cloyingly sweet while still balancing the tartness of the apples—trust the process, even if it feels slow.
Dietary considerations for apple pie jam
Sugar-Free Adaptation
For a diabetic-friendly version, replace the 3 cups granulated sugar with 1.5 cups sugar-free erythritol blend (like Lakanto or Swerve) and 1.5 cups unsweetened applesauce.
The applesauce adds natural sweetness while reducing sugar content. Simmer for an extra 5-7 minutes to achieve the same thickness, as sugar-free sweeteners behave differently. 💡
Low-Sugar Option
Cut the sugar to 2 cups and add ½ cup apple cider vinegar to enhance tanginess. This reduces calories while maintaining balance. The jam will be slightly less sweet but still rich—perfect for those watching sugar intake. I find this version pairs beautifully with Greek yogurt or cottage cheese. 🥛
Gluten-Free Safety
This recipe is naturally gluten-free, but double-check your ingredients: use certified gluten-free spices (like Penzeys brand) and ensure vinegar is gluten-free. The butter and sugar are typically safe, but always verify labels. The crust-like texture remains intact even without gluten modifications. ✨
Vegan Version
Replace butter with 2 tbsp vegan butter (like Earth Balance) or coconut oil. For extra richness, add 1 tbsp tahini at the end. The texture stays similar, though slightly softer. This version works perfectly for vegan cheese boards or plant-based desserts. 🌱
Allergen-Friendly
For nut allergies, ensure all spices are processed in nut-free facilities. If using store-bought spices, check labels for cross-contamination warnings. The recipe is otherwise free from top allergens, making it safe for most dietary restrictions. Always verify ingredient sources when in doubt. 💪
Keto Adaptation
Replace sugar with 1 cup monk fruit sweetener (like Lakanto) and 1 cup unsweetened applesauce. Simmer for 10-12 minutes longer to achieve the desired consistency.
The result is a keto-friendly jam with less than 3g net carbs per serving**. Pair with almond flour toast for a perfect low-carb treat. 🥑
Nutrition facts
Frequently asked questions
Can I use frozen apples instead of fresh for this jam?
Yes, but with a few adjustments. Use 1 lb frozen apple pieces (thawed and drained) for every 2 lb fresh apples in the recipe. Frozen apples work well, but they may release more liquid during cooking, so you might need to simmer slightly longer (5-10 minutes extra) to achieve the same thickness.
Why does my jam turn out too runny?
Runny jam usually means the apples weren't cooked long enough or the sugar ratio was off. For this recipe, simmer until the mixture coats the back of a spoon and wrinkles when chilled. If it's still too thin, return to low heat and cook for another 5-10 minutes while stirring constantly. Avoid adding extra sugar—it won't fix the texture.
How do I store this apple pie jam?
Store in a clean, airtight jar in the refrigerator for up to 3 weeks. For longer storage, process in a water bath for 15 minutes to seal, extending shelf life to 1 year. The flavors actually improve over time, especially after 1-2 weeks of refrigeration. Label jars with the date to track freshness.
Can I adjust the spice levels in this recipe?
For a milder flavor, reduce cinnamon to 1 tbsp and nutmeg to ¼ tsp. Want more warmth? Add ½ tsp cardamom or ¼ tsp cloves. Always taste before the final simmer—spices intensify as the jam cools. Start with small adjustments to avoid overpowering the apple flavor.
What's the best way to use up leftover jam?
Spread it on toast, drizzle over yogurt, or use as a glaze for ham or pork chops. For a dessert twist, fill mini phyllo cups or layer in cheesecake. The crust-like texture makes it perfect for thick dipping sauces or even a pie filling substitute. Get creative—it's delicious in both sweet and savory dishes!