Desserts
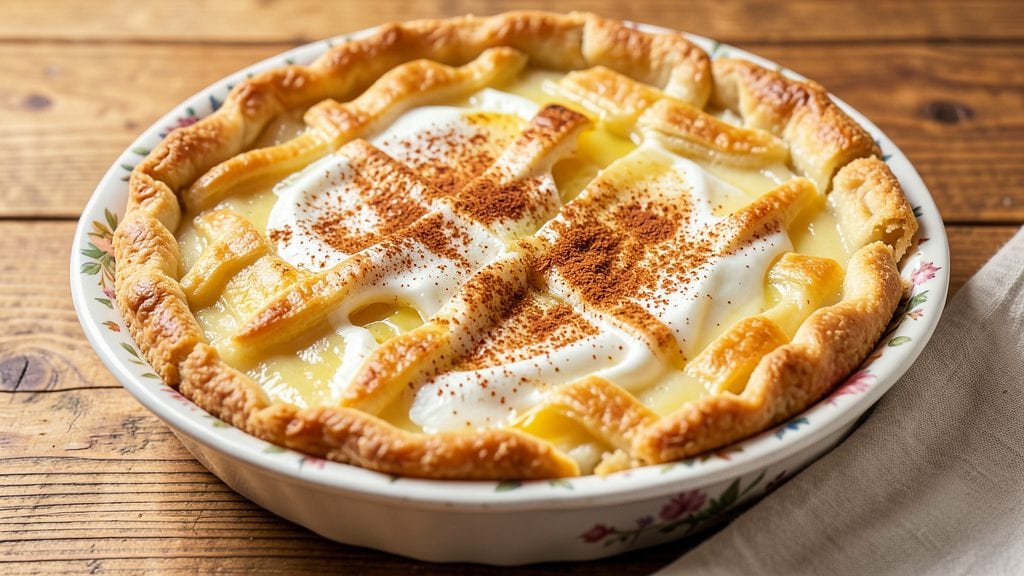
Grandma's custard pie recipe brings back memories of warm kitchens and Sunday dinners—its silky vanilla filling and buttery crust are pure comfort in every bite. The secret lies in tempering the eggs properly to avoid lumps while baking until the center is just set, not rubbery.
I've perfected this version over years, balancing tradition with modern shortcuts like pre-made crusts for busy cooks.
This recipe delivers a classic custard pie with a golden, flaky crust and a velvety filling that's rich yet smooth. The vanilla flavor shines through while the cinnamon adds warmth, creating a dessert that feels both nostalgic and refined.
Whether you're baking for a family gathering or treating yourself to a slice, the result is always restaurant-quality.
What sets this recipe apart is the foolproof custard technique—no lumps, no curdling, just perfect texture every time. The crust stays crisp at the edges while remaining tender underneath, holding up to the creamy filling without becoming soggy.
It's the kind of dessert that disappears quickly, leaving only crumbs and happy memories behind.
For those who love tradition, you can make the crust from scratch, but even using a store-bought version keeps the filling's magic intact. Try variations like adding pumpkin puree for a fall twist or swirling in melted chocolate for a decadent upgrade.
Either way, this pie is guaranteed to become a family favorite.
Ingredients for grandma's custard pie
Classic ingredients that transform into Grandma's legendary custard pie—silky filling meets buttery crust perfection.
| Ingredient | Amount | Notes |
|---|---|---|
| Large Eggs 🥚 | 6 whole | Room temperature for best results |
| Granulated Sugar 🍚 | 1 ½ cups | White or light brown preferred |
| All-Purpose Flour 🌾 | ½ cup | For thickening custard |
| Heavy Whipping Cream 🥛 | 2 cups | Full-fat for creaminess |
| Pure Vanilla Extract 🌿 | 2 tsp | High-quality, not imitation |
| Ground Cinnamon 🌶️ | 1 tsp | Freshly ground preferred |
| Salt 🧂 | ½ tsp | Fine sea salt preferred |
| Unsalted Butter 🧈 | ½ cup | Cold, cubed for crust |
| All-Purpose Flour 🌾 | 1 ¼ cups | For pie crust |
| Ice Water 💧 | ½ cup | For pie crust |
| Pie Crust (Store-Bought or Homemade) 🥧 | 1 whole | Pre-made or homemade |
| Whole Milk 🥛 | 1 cup | For custard richness |
The eggs are the heart of this custard. Use large eggs for the right thickness, and make sure they're at room temperature—cold eggs can cause lumps that won't temper properly. For the best quality, Whole Foods or local farms often carry fresher eggs than the average grocery store. The vanilla extract matters too—Nielsen-Massey or McCormick Pure brands are reliable choices. If you're making the crust from scratch, butter should be cold and cut into small cubes for maximum flakiness. The pie crust can be store-bought for convenience, but homemade adds that nostalgic touch.
No vanilla extract? Seeds from a vanilla bean work beautifully, though you'll need about 2 beans for the same flavor. Substituting milk? Heavy cream works in a pinch, but the texture will be slightly lighter. For the cinnamon, if you can't find freshly ground, measure out the same amount of pre-ground—it's still effective. The flour in the filling acts as a thickener, but if you're gluten-free, cornstarch at the same ratio will work. For the crust, if you're short on butter, lard or shortening can be used, though the flavor will differ slightly. Always use whole milk for the best custard texture—skim or almond milk won't give the same rich result.
This custard pie keeps beautifully in the fridge for up to 5 days, though it's best enjoyed within the first 2 days. For longer storage, freeze the baked pie (without the crust) for up to 3 months2 weeks if you're prepping ahead. To reheat, warm slices in the oven at 350°F for 5-10 minutes to restore that fresh-from-the-oven warmth. Leftovers make great breakfast pastries—just add a drizzle of maple syrup!
Why You'll Love This Recipe
- Here’s what sold me: this recipe uses pantry staples and stretches further than you’d think. A single pie feeds four heartily, and leftovers reheat beautifully—whether I’m packing lunches or sneaking seconds at midnight. (Yes, even on a Tuesday night.)
- No-Fuss Filling: I swear by this recipe because it’s one of those rare desserts where the hardest part is cracking the eggs. The custard base—just eggs, sugar, flour, and cream—goes together in a saucepan while you make the crust, and honestly? No one’s judging if it’s not perfectly smooth.
- Vanilla Kiss Magic: That pure vanilla extract isn’t just flavor—it’s the soul of this pie. The custard thickens into this silky, golden layer that’s sweet but not cloying, with a whisper of warmth from the vanilla that makes every bite feel like a hug.
- Weeknight or Company: Between us, this pie is my go-to for potlucks and lazy Sundays. The crust holds up for days (if it lasts that long), and the custard stays creamy even when sliced cold—perfect for meal prep or when unexpected guests show up.
Step-by-step instructions for Grandma's custard pie recipe
Here's how to create a velvety custard filling that pairs perfectly with a buttery crust.
Prepare the Pie Crust
Roll out the pie crust on a lightly floured surface until it's about 12 inches in diameter. Gently fold it in half and transfer it to a 9-inch pie dish. Unfold carefully and press it into the bottom and up the sides, creating a slight overhang. Trim the excess dough, leaving about ½-inch border. Chill the crust in the refrigerator while you prepare the filling.
Preheat your oven to 375°F. Line the chilled crust with parchment paper and fill it with pie weights or dried beans. Bake for 15 minutes until the edges begin to set. Remove the weights and bake for another 5 minutes until the crust is lightly golden. This pre-baking prevents a soggy bottom when you add the custard later.
Whisk the Custard Base
In a medium bowl, whisk together the 6 whole Large Eggs, 1.5 cups Granulated Sugar, 0.5 cup All-Purpose Flour, 1 cup Whole Milk, 2 tsp Pure Vanilla Extract, 1 tsp Ground Cinnamon, and 0.5 tsp Salt until smooth and fully combined. The mixture should be thick but pourable. I like to use a whisk for this step to avoid overmixing, which can develop gluten and make the custard grainy.
Here's the thing—don't worry if the mixture looks slightly lumpy. The eggs and flour will emulsify as they cook, creating that signature silky texture. The key is to whisk until everything is evenly distributed, with no dry flour clumps remaining.
Temper the Egg Mixture
In a separate saucepan, melt the 0.5 cup Unsalted Butter over medium heat. Once melted, slowly pour about 1 cup of the hot butter mixture into the egg mixture while whisking constantly. This tempering step prevents the eggs from curdling when they hit the hot liquid. After adding the first splash, return the mixture to the saucepan.
Cook the custard over medium-low heat, stirring constantly with a wooden spoon, until it thickens enough to coat the back of the spoon (15-18 minutes). You'll notice the mixture will go from a thin batter to a thick, glossy pudding-like consistency. Remove from heat immediately once it reaches this stage—overcooking will make it grainy.
Add the Cream and Finish
Reduce the heat to low and slowly pour in the 2 cups Heavy Whipping Cream while whisking gently to combine. The custard should thicken further as it incorporates the cream. Continue cooking for another 2-3 minutes, stirring constantly, until the mixture reaches 170°F on an instant-read thermometer. This temperature ensures the custard is fully cooked and safe to eat.
Real talk: At this point, the custard should be thick enough to hold its shape when you spoon it. If it's still too thin, cook it for another minute or two. But don't let it boil—you want it silky, not scrambled. Remove from heat immediately once it reaches the proper consistency.
Assemble and Bake
Pour the hot custard filling into the pre-baked crust, spreading it evenly with a spatula. The filling should come about ¼-inch from the top edge of the crust. Place the pie on a baking sheet to catch any potential spills and bake at 350°F for 40-45 minutes. The custard is done when the center is just set but still slightly wobbly—it will continue thickening as it cools.
Let the pie cool completely at room temperature before refrigerating for at least 4 hours or overnight. This resting period allows the flavors to meld and the texture to become perfectly smooth. Serve chilled with a dollop of whipped cream or a sprinkle of ground cinnamon for that classic touch.
Pro Tips For Making Grandma'S Custard Pie
- Whisk Eggs Slowly: Pour the eggs into the sugar mixture in a thin, steady stream while whisking constantly—this prevents scrambling and ensures a silky texture. I used to dump them all at once, and the result was always lumpy. A whisk, not a fork, is your friend here.
- Temper the Cream: Warm the heavy cream just until it’s steaming (about 160°F) before mixing it into the egg custard—this keeps the eggs from curdling. After burning custard twice, I learned to test the cream with a thermometer. If you don’t have one, touch a spoon to your lips: it should feel warm but not hot.
- Skip the Overmixing: Once the flour is stirred into the custard, stop mixing immediately after it disappears—overworking it makes the filling gummy. I used to beat it like I was kneading dough, and the pie always turned out dense. Just a few stirs until smooth is all you need.
- Chill Before Baking: Let the pie sit uncovered in the fridge for 30 minutes before baking—this helps the filling set evenly and prevents cracking. I was always impatient and popped it straight in the oven, only to watch the center puff up like a volcano. Patience here saves cleanup later.
Dietary considerations for these flavors
Gluten-Free Adaptations
For a gluten-free version, replace the ½ cup all-purpose flour in the custard with ½ cup cornstarch—it thickens just as effectively. Use a gluten-free pie crust like Bob's Red Mill's 1:1 blend or a store-bought brand like Pillsbury Gluten-Free.
The texture stays creamy, though you might notice a slightly lighter body. Always check labels to avoid cross-contamination if strict gluten-free requirements apply. 🌾
Dairy-Free Options
Swap the whole milk and heavy cream for full-fat coconut milk (canned, not cartoned) and unsweetened almond milk mixed 50/50. Use dairy-free butter like Earth Balance for the crust and temper the custard with coconut milk instead.
The flavor will be subtly different but still rich. For extra creaminess, add 2 tbsp arrowroot powder to the custard mixture. 🥥
Lower-Sugar Versions
Reduce the sugar to 1 cup and add 1 tbsp monk fruit sweetener or 2 tbsp erythritol to maintain sweetness without overpowering. The custard will still set properly, though it may be slightly less luscious.
Balance with extra vanilla extract (3 tsp) and a pinch of cinnamon for depth. This works well for diabetic-friendly adaptations while keeping the pie satisfying. 🍯
Egg-Free Custard
For an egg-free version, use ½ cup cornstarch and 1 cup water mixed with the milk and cream before adding to the saucepan. Cook until thickened, then proceed as usual.
The texture will be slightly lighter but still cohesive. This is ideal for vegan adaptations, though the crust must also be egg-free (like a flaxseed-based crust). 🥚
Nut-Free Considerations
This recipe is naturally nut-free, but always double-check labels on store-bought crusts and dairy products. If using homemade crusts, ensure no cross-contamination with nuts. For extra safety, prepare the pie in a dedicated nut-free kitchen area.
The vanilla extract and spices should also be nut-free certified if allergies are a concern. 🌟
Allergy-Friendly Tips
For soy allergies, use a soy-free vanilla extract (like McCormick Pure) and check butter labels for soy lecithin. For sesame-free kitchens, avoid pre-made crusts with sesame oil—make your own with olive oil instead.
Always read ingredient lists carefully, especially for hidden allergens in spices and extracts. A little caution goes a long way in keeping everyone safe. 💡
Nutrition facts
Frequently asked questions
Why does my custard pie filling look grainy after baking?
Overmixing the egg mixture or cooking it too long creates lumps. Temper the eggs properly by slowly adding hot butter mixture while whisking, and remove from heat as soon as it coats the back of a spoon (170°F). Stirring constantly prevents graininess. For extra silkiness, strain the custard through a fine-mesh sieve before pouring into the crust.
Can I make the custard filling ahead of time?
Prepare the custard up to 2 days in advance and refrigerate it in an airtight container. When ready to bake, reheat it gently in a double boiler until warm (don't boil) and pour into the pre-baked crust. This shortcut saves time without sacrificing texture.
How do I fix a runny custard pie?
Undercooked custard is the usual culprit. Reheat the pie at 325°F for 15-20 minutes until the center is set. For extra stability, mix 1 tbsp cornstarch with 2 tbsp cold water, stir into the custard, and bake again. Avoid overfilling the crust—leave ¼-inch headspace.
What's the best way to store leftovers?
Keep slices in an airtight container in the fridge for up to 5 days. For longer storage, freeze individual portions (without the crust) for 3 months. Thaw overnight in the fridge and reheat covered in the microwave for 20-30 seconds to restore creaminess.
Can I use this recipe for a pumpkin custard pie?
Yes! Replace 1 cup of the milk with 1 cup pumpkin puree and add 1 tsp pumpkin pie spice. Reduce sugar slightly (1.25 cups) since pumpkin is naturally sweet. The custard will thicken differently—check doneness at 165°F instead.