Desserts
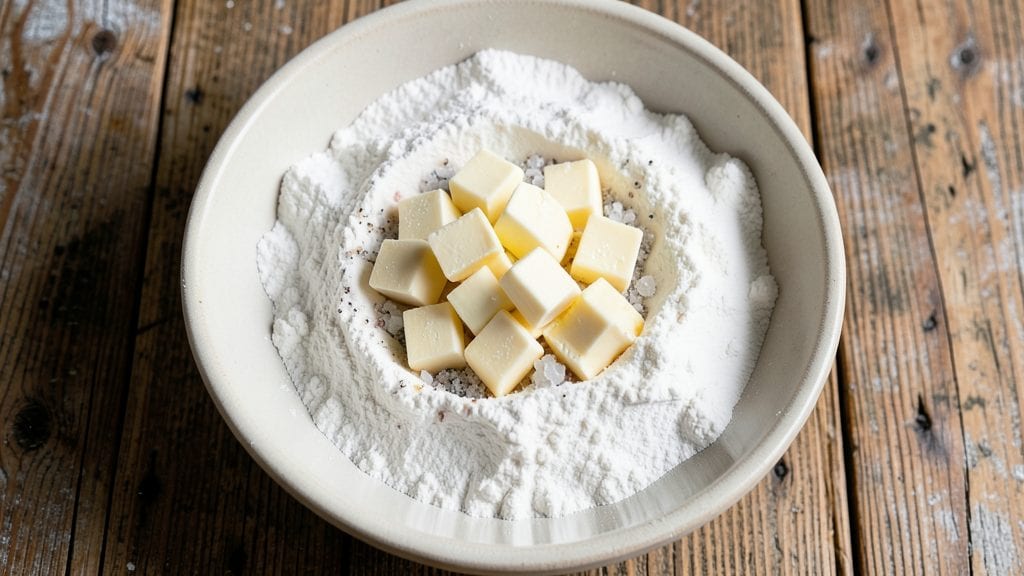
Grandma's pie crust recipe delivers the golden, flaky layers that make homemade pies taste like a bakery. The secret lies in cold butter cut into flour until it resembles coarse meal—this creates those signature air pockets that puff up into delicate, crisp layers when baked.
I learned this technique from my grandmother, who swore by the "less mixing, more chilling" method to prevent tough crusts.
This classic recipe uses simple ingredients—all-purpose flour, salt, ice water, and cold butter—but the method is what transforms them into something extraordinary. The dough rests in the refrigerator for at least an hour (or overnight for best results), which relaxes the gluten and ensures tender, not chewy, layers.
No food processor or fancy tools required—just your hands and patience.
What you'll end up with is a pie crust so flaky it practically melts in your mouth, with a golden-brown crust that's crisp enough to hold its shape yet tender enough to disappear with each bite.
The cold butter trick is non-negotiable; it's what creates those signature layers that separate homemade pies from store-bought. This is the foundation of perfect pies, from classic apple to rich pecan.
For those with dietary needs, variations include using lard for a richer flavor, shortening for extra flakiness, or even vegan butter for plant-based options. The principles remain the same—keep everything cold, handle the dough gently, and chill before rolling. Let's get started on the crust that makes every pie unforgettable.
Ingredients for grandma's pie crust
Four simple ingredients transform into the flakiest pie crust you'll ever make—no shortcuts, just cold butter and patience.
| Ingredient | Amount | Notes |
|---|---|---|
| All-Purpose Flour 🌾 | 2 ½ cups | Sifted for lighter texture |
| Unsalted Butter 🧈 | 1 cup | Cold, cubed into 1/2-inch pieces |
| Ice Water 💧 | ⅓ cup | Chilled, not tap water |
| Fine Sea Salt 🧂 | ½ tsp | Adjust to taste |
| Granulated Sugar 🍚 | 1 tbsp | Balances saltiness |
The butter is everything. Use European-style butter like Plugrá or Land O'Lakes unsalted—it has higher fat content for better flakiness. Keep it frozen until ready to cut into the flour, then let it sit just long enough to firm up slightly. King Arthur or Bob's Red Mill flour works best here; avoid bread flour as it adds gluten. The ice water is non-negotiable—tap water will make the crust tough. If you're in a hurry, freeze the water in ice cube trays for perfect cubes. For extra flakiness, chill your rolling pin before using it.
No butter? Lard or shortening works in a pinch—lard gives the richest flavor, while shortening makes it extra flaky. Running short on ice water? Freeze your measuring cup for 10 minutes before filling. The sugar can be omitted if you prefer a savory crust, but it helps balance the salt and adds a subtle sweetness to fruit pies. For a vegan option, use vegan butter (like Earth Balance) and make sure it's very cold. The dough should hold together when pressed but not be sticky—if it's too dry, add a teaspoon of ice water; if too wet, sprinkle in a bit more flour.
This dough must rest. Wrap tightly in plastic and refrigerate for at least 1 hour, or up to 2 days for best results. If you need to roll it out immediately, chill the dough on a baking sheet for 15 minutes first. Leftover dough can be frozen for up to 3 months—wrap it tightly and thaw in the fridge overnight. For a shortcut, double the recipe and freeze half for next time. The secret to perfect pies? Keep everything cold—warm dough shrinks and loses its flakiness.
Why You'll Love This Recipe
- No-Fuss Assembly: I swear, this crust comes together faster than I can put on a pot of coffee. Just cube the cold butter into flour—no food processor needed—and pulse until it looks like coarse sand. The ice water ties it all together in seconds, no measuring cups to stress over.
- Buttery Crisp Magic: That sugar in the dough? It’s not just for looks. It caramelizes when baked, giving the edges that irresistible golden crunch while keeping the center tender. Honestly, I’ve tried store-bought crusts, but this one’s in a league of its own—flaky, rich, and impossible to resist.
- Pie Pan to Party: This crust isn’t just for apple or pumpkin—it’s my go-to for savory galettes, hand pies, or even a cheesy quiche. Freeze half the dough ahead of time, and you’ve got a last-minute dessert or breakfast ready to roll out. (Yes, even on a Tuesday night.)
- Pantry Staples Only: Between us, this recipe uses ingredients you already have. Cold butter, flour, and a pinch of salt—no exotic spices or specialty flours. It’s the kind of crust that works when you’re broke, when you’re busy, or when you just don’t feel like shopping. And it keeps well, so you’re never stuck without backup.
Step-by-step instructions for Grandma's pie crust recipe
Here's the method that guarantees flaky, golden layers every time—just like Grandma's.
Prepare the Cold Butter and Flour Mixture
Cut the 1 cup unsalted butter into ½-inch cubes and place them on a plate. Return them to the refrigerator to stay cold—this is critical for flaky layers. In a large bowl, whisk together the 2.5 cups all-purpose flour, 0.5 teaspoon fine sea salt, and 1 tablespoon granulated sugar. Sifting the flour first removes lumps and creates a lighter texture.
I like to use my fingers to break up any remaining flour clumps in the bowl. This ensures even distribution of the sugar and salt throughout the dough. The sugar balances the saltiness and adds a subtle sweetness that complements savory fillings perfectly.
Cut in the Cold Butter
Add the cold butter cubes to the flour mixture. Using a pastry cutter or your fingertips, work the butter into the flour until you have pea-sized crumbs with some larger butter pieces remaining. This texture is what creates those beautiful flaky layers when baked.
Don't overwork the butter—you want to see some larger pieces still visible. If the mixture starts to look like wet sand, add 1-2 ice cubes from your 0.33 cup ice water to keep everything cold. Warm butter melts too quickly, leading to tough crust instead of flaky.
Gradually Add Ice Water
With a fork or your fingers, gradually sprinkle the 0.33 cup ice water over the mixture, 1 tablespoon at a time, mixing gently after each addition. The dough should come together when lightly pressed but still feel slightly crumbly. Overmixing develops gluten, which makes the crust tough.
Here's the thing—this dough should feel dry when you first form it. That's normal. Once it rests, the cold butter will melt just enough to create that perfect flaky texture. If the dough feels too sticky, add 1 more ice cube; if it's too dry, add 1 more teaspoon of ice water.
Chill the Dough for Maximum Flakiness
Divide the dough into two equal discs, flatten slightly, wrap each in plastic wrap, and refrigerate for at least 1 hour (or up to 2 days). Chilling is non-negotiable—it firms up the butter and relaxes the gluten, preventing shrinking and ensuring those delicate layers.
I know it's tempting to skip this step, but don't. The longer you chill, the better the crust. If you're short on time, at least 30 minutes in the freezer works in a pinch. The dough should be cold to the touch when ready to roll.
Roll and Transfer to Pie Dish
On a lightly floured surface, roll one disc of dough into a 12-inch circle, about ⅛-inch thick. If the dough cracks, gently press it back together—don't worry, it's normal. Transfer the rolled crust to your 9-inch pie dish, pressing it gently into the bottom and up the sides.
Trim any excess dough hanging over the edge with kitchen shears. For extra flakiness, I like to dock the crust with a fork by pressing it all over the surface. This prevents puffing during baking. Repeat with the second disc for a top crust if needed, or save it for another pie.
Pro Tips For Making Grandma'S Pie Crust
- Cut Butter in Cubes: Skip the soft butter—use ice-cold cubes straight from the freezer. I learned this the hard way after struggling with greasy dough that wouldn’t hold its shape. The butter should stay pea-sized as you work, or your crust will turn out tough instead of flaky.
- Chill the Dough Twice: Let the dough rest in the fridge for at least an hour, then pop it back in for another 30 minutes before rolling. Sounds like overkill, but this guarantees a tender crust that won’t shrink or crack when baking. (Yes, even if you’re impatient like me.)
- Use Cold Water, Not Ice: Ice water might seem like a good idea, but it can make the dough gummy. Instead, use water that’s just cold enough to chill your hands when you touch it—about 40°F. This keeps the gluten relaxed without overworking the dough.
- Salt the Butter Too: If your unsalted butter is bland, add a pinch of fine sea salt directly to it while cutting it into the flour. This isn’t just about taste—it also helps balance the sweetness of the sugar in the crust. (Your future self will notice the difference.)
Pro cooking tips for great grandma's pie crust
Cold Butter Technique
The cold butter trick is non-negotiable for flaky crust. Use European-style butter like Plugrá—it stays firm longer when chilled. Cut it into ½-inch cubes and freeze for 10 minutes before mixing to ensure it stays rock-hard.
When cutting into flour, aim for pea-sized crumbs with some larger pieces remaining—this creates those signature layers. If your kitchen is warm, chill the mixing bowl too. 🧈
Gluten Control
Overmixing develops gluten, leading to tough crust. Work the dough just until it holds together—no more than 10-12 strokes with a fork. If the dough feels sticky, add 1 ice cube at a time instead of extra flour.
For extra tenderness, replace ¼ cup of flour with ¼ cup cornstarch in the dry ingredients. This reduces gluten while keeping the structure intact. 💡
Chilling Strategies
Chilling is where the magic happens. For maximum flakiness, refrigerate the dough for at least 2 hours (overnight is ideal). If you're in a hurry, freeze the dough discs for 30 minutes before rolling.
Wrap dough tightly in plastic wrap to prevent drying. Pro tip: Place a damp towel over the dough in the fridge to maintain moisture. Never skip this step—warm dough shrinks and loses flakiness. ❄️
Rolling Pin Hacks
Use a chilled rolling pin (place it in the freezer for 10 minutes) to prevent the dough from warming up. Roll from the center outward, rotating the dough occasionally for even thickness. If the dough cracks, gently press it back together—don’t panic, it’s normal.
For extra flakiness, roll the dough ⅛-inch thick and let it rest 5 minutes before transferring to the pie dish. This relaxes the gluten further. 🔄
Docking for Perfection
Docking prevents puffing during baking. Use a fork to press small holes all over the crust surface before adding filling. For a lattice top, roll one dough disc ⅛-inch thick, cut into 1-inch strips, then weave them over the pie.
Brush the crust with egg wash (1 egg + 1 tbsp water) for a golden finish. Bake at 375°F for 15 minutes before adding filling to pre-cook the crust. 🌟
Troubleshooting Tips
If your crust shrinks during baking, it was too warm. Next time, chill the dough longer and use more ice water. For a preventive measure, blind-bake the crust (cover with parchment + pie weights) for 10 minutes before adding filling.
If the crust browns too quickly, tent it with foil. For extra crispiness, brush the baked crust with melted butter and sprinkle with coarse sugar before serving. 💪
Nutrition facts
Frequently asked questions
Why does my crust turn out tough instead of flaky?
Overmixing or warm butter are the usual culprits. The dough should feel dry and crumbly when formed—never sticky. Always use cold butter (even frozen) and mix just until combined. If your kitchen is warm, chill the mixing bowl too. For extra flakiness, replace ¼ cup flour with cornstarch.
Can I make this crust without a food processor?
Your fingertips work perfectly. Cut the cold butter into the flour until you get pea-sized crumbs with some larger pieces remaining. This manual method gives you better control over the texture. Just work quickly to keep everything cold.
How long can I refrigerate the dough before using it?
Up to 2 days wrapped tightly in plastic. For longer storage, freeze the dough discs for up to 3 months. Thaw overnight in the fridge before rolling. The longer it chills, the better the flakiness—just don't skip the 1-hour minimum rest.
What's the best way to handle cracked dough?
Don't panic—cracks are normal! Gently press the dough back together with your fingers. If it's too warm, chill it for 10-15 minutes before rolling. For extra insurance, roll the dough ⅛-inch thick and let it rest 5 minutes before transferring to your pie dish.
Can I substitute butter with shortening or lard?
Yes! Shortening creates extra flakiness, while lard adds rich flavor. Use the same amount (1 cup) as butter. For lard, make sure it's leaf lard (not leaf fat) for the best texture. Shortening works well in warm kitchens since it stays firm longer than butter.