Desserts
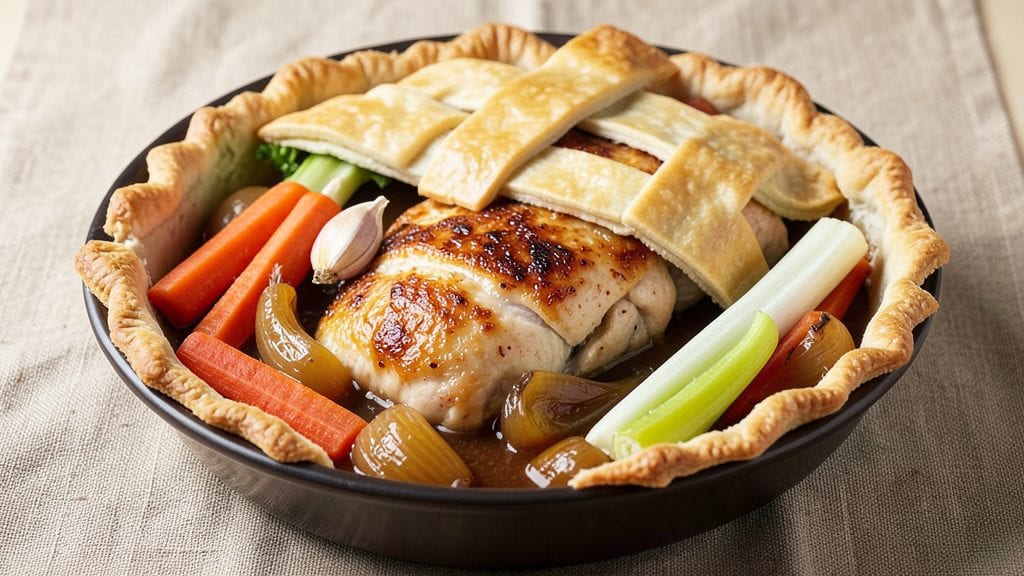
A Pillsbury pie crust pot pie delivers all the comfort of homemade without the fuss of homemade crusts. The secret lies in that flaky, buttery Pillsbury crust that encases a hearty filling of tender meat and vegetables, creating a golden, bubbling masterpiece.
I’ve perfected this recipe to ensure the crust stays crisp while the filling remains rich and savory—no rolling or pie-dough stress required.
This recipe works beautifully with chicken, beef, or even a hearty vegetarian filling, all using simple ingredients you likely already have on hand. The key is building flavor in the filling with aromatic vegetables, herbs, and a touch of creaminess before sealing it all under that golden crust.
It’s the kind of dish that transforms a weeknight into a cozy dinner with minimal effort.
By the time it emerges from the oven, you’ll have a pot pie with a perfectly browned crust that flakes easily, revealing tender meat and vegetables swimming in a velvety sauce.
The aroma alone will have everyone gathering around the table, and the first bite delivers that satisfying mix of crispy, creamy, and savory. It’s restaurant-quality comfort food, made easier with Pillsbury.
Whether you’re feeding a family or prepping for leftovers, this pot pie adapts effortlessly. Serve it with a side salad or crusty bread to soak up every last drop of that delicious filling. Let’s get started on creating this foolproof, golden-crusted masterpiece.
Ingredients for pillsbury pie crust pot pie
Pantry staples plus two Pillsbury crusts. That's all you need for this foolproof pot pie.
| Ingredient | Amount | Notes |
|---|---|---|
| Pillsbury Pie Crust (2 crusts) 🥧 | 2 packages | Thawed if frozen, kept chilled |
| Boneless Chicken Thighs 🍗 | 2 lb | Trimmed, cut into bite-sized pieces |
| Carrots 🥕 | 1 ½ lb | Peeled, sliced into rounds |
| Yellow Onion 🧅 | 1 whole | Diced, medium size |
| Celery Stalks 🥬 | 3 whole | Diced, medium size |
| Garlic Cloves 🧄 | 4 cloves | Minced, fresh preferred |
| All-Purpose Flour 🌾 | 2 tbsp | For thickening sauce |
| Heavy Cream 🥛 | 1 cup | Full-fat for creaminess |
| Chicken Broth 💧 | 2 cups | Low-sodium preferred |
| Frozen Peas 🌱 | 1 cup | Thawed, no need to drain |
| Dried Thyme 🌿 | 1 tsp | Or 1 tbsp fresh |
| Salt 🧂 | 1 ½ tsp | Kosher or sea salt |
| Black Pepper 🌶️ | ½ tsp | Freshly ground preferred |
| Butter 🧈 | 2 tbsp | Unsalted, melted |
| Egg 🥚 | 1 whole | Beaten, for egg wash |
The Pillsbury crust is non-negotiable here—it's what gives you that perfect golden, flaky finish. Grab the refrigerated kind (not frozen) from any grocery store—Walmart or Kroger usually have them in stock. If you're short on time, thaw the frozen ones overnight in the fridge. The chicken thighs are a game-changer too—they stay juicier than breasts after baking. I always buy mine from the butcher section if available, but the pre-packaged ones work fine. Trim any big fat chunks for cleaner bites, but don't stress about perfection.
No chicken thighs? Chicken breasts work too, but pound them thinner first. Short on carrots? Sweet potatoes or potatoes hold up great in the filling. The frozen peas are a lifesaver—no chopping, just add them straight from the freezer. Fresh thyme is ideal, but dried works at one-third the amount. For the broth, low-sodium is key—you don't want to over-salt the whole dish. The heavy cream adds richness, but half-and-half works in a pinch. Just remember: no skim milk here, we're going for velvety, not watery.
This pot pie reheats beautifully—honestly tastes better the next day. Store leftovers in an airtight container for up to 4 days in the fridge. For freezing, assemble the pie, bake until golden, then cool completely before wrapping tightly. Keeps for 2 months frozen. I always make a double batch—one for dinner, one for lunches. The crust stays crispy even after reheating, so you won't lose that satisfying crunch.
Why You'll Love This Recipe
- Two-Crust Magic: I swear by this trick—unfolding those Pillsbury crusts and folding them over the filling like a hug. No rolling, no fuss, and that golden, flaky blanket over tender chicken and veggies? It’s the kind of shortcut that still feels like a masterpiece.
- Savory Soul Food: Between us, the chicken thighs stay juicy while the carrots and celery soften just enough to melt into the creamy sauce. Add a pinch of thyme or a dash of Worcestershire, and suddenly you’ve got that homestyle pot pie flavor—rich, comforting, and impossible to resist.
- Weeknight Wonder: This is my go-to when I’m too tired to fuss but still want something hearty. Toss in whatever veggies you have (frozen peas? no problem) and bake it while you fold laundry. By the time the timer dings, dinner’s ready—and no one’s complaining about leftovers.
- Budget-Friendly Feast: Honestly, this recipe stretches my grocery dollars perfectly. Chicken thighs are cheaper than breasts, carrots and onions last forever, and two pie crusts feed a crowd without breaking the bank. Plus, the leftovers reheat like a dream—crispy crust, creamy filling, all in one bite.
Step-by-step instructions for Pillsbury pie crust pot pie
Here's how to make this comforting pot pie with tender chicken and veggies.
Sear the Chicken and Prepare Vegetables
Heat a large skillet over medium-high heat and add the 2 tablespoons butter. Once melted, add the 2 lb boneless chicken thighs in a single layer and cook for 5-6 minutes until golden brown on both sides. Remove the chicken and set aside.
In the same skillet, add the 1 whole yellow onion, 3 whole celery stalks, and 1.5 lb carrots. Cook for 5 minutes until the vegetables begin to soften. Add the 4 cloves minced garlic and cook for another 30 seconds until fragrant. Sprinkle with 1.5 teaspoons salt and 0.5 teaspoon black pepper, stirring to combine.
Build the Filling Mixture
Return the chicken to the skillet and stir to combine with the vegetables. Sprinkle the 2 tablespoons all-purpose flour over the mixture and stir well to coat everything evenly. Cook for 1-2 minutes to remove any raw flour taste.
Pour in the 2 cups chicken broth and 1 cup heavy cream, scraping up any browned bits from the bottom of the pan. Add the 1 cup frozen peas and 1 teaspoon dried thyme. Bring the mixture to a gentle simmer, then reduce heat to low and let it cook for 10 minutes, stirring occasionally, until the sauce has thickened slightly.
Assemble the Pot Pie
Preheat your oven to 375°F. Unroll one of the 2 packages Pillsbury pie crust and place it in a 9-inch pie dish, pressing gently to fit. Spoon the chicken and vegetable mixture evenly into the crust, mounding it slightly in the center.
Unroll the second package of pie crust and place it on top of the filling. Trim any excess crust from the edges and seal it to the bottom crust by pressing the edges together. Cut a few small slits in the top crust to allow steam to escape during baking.
Add Egg Wash and Bake
In a small bowl, beat the 1 whole egg with a fork. Brush the egg wash evenly over the top crust. This will give your pot pie that beautiful golden finish. Place the pot pie on a baking sheet to catch any drips.
Bake for 40-45 minutes, or until the crust is golden brown and the filling is bubbling through the slits in the top crust. The internal temperature of the chicken should reach 165°F. Let the pot pie rest for 10 minutes before serving to allow the filling to set slightly.
Pro Tips For Making Pillsbury Pie Crust Pot Pie
- Trim the Chicken Right: Cut those chicken thighs into 1-inch chunks—no bigger, no smaller. I used to leave them uneven, and they’d either overcook into rubber or stay underdone in the center. Uniform size means even cooking every time, especially when you’re layering them under that crust.
- Melt the Butter First: Brown the onions, celery, and carrots in the butter before adding chicken. The butter will coat the veggies better, and you’ll get deeper flavor—no sad, watery filling here. Skip this, and your pot pie tastes like it’s missing something.
- Vent Those Crusts: Cut a few slits in the top crust before baking—about 4 or 5, just enough to let steam escape. I learned this the hard way when my first pot pie exploded in the oven like a sad volcano. Venting keeps the crust crispy, not soggy.
- Chill the Filling: Let the cooked filling cool to room temp for 10 minutes before assembling. Cold filling = less soggy crust. I know, it’s tempting to dive right in, but trust me—your pot pie will thank you with a golden, flaky top instead of a greasy mess.
Troubleshooting this recipe
Soggy Crust Fix
If your crust turns out soggy instead of crisp, the issue is usually steam buildup. I’ve found that cutting more slits in the top crust (about 6-8 slits) helps release steam without letting filling escape.
Also, bake on the lower oven rack—the hotter air at the bottom crisps the crust faster. For extra insurance, sprinkle ½ cup breadcrumbs between the crusts before sealing. 🌡️
Undercooked Filling
When the filling isn’t fully cooked, it’s often because the pot pie didn’t bake long enough. Use an instant-read thermometer to check the chicken’s internal temperature—it should reach 165°F.
If your pot pie comes out undercooked, tent it with foil and bake for an additional 15-20 minutes at 350°F. For next time, pre-cook the filling separately until fully done before assembling.
Filling Too Watery
A watery filling usually means the sauce didn’t thicken enough. To fix this, simmer the filling uncovered for an extra 5-10 minutes after adding the flour. If it’s already assembled, bake uncovered for 10 minutes to evaporate excess moisture.
For prevention, reduce the broth by half (use 1 cup instead of 2 cups) or add 1 extra tablespoon of flour when thickening.
Crust Not Browning
If your crust stays pale, it’s likely because the egg wash didn’t set properly. Brush the crust with melted butter before adding the egg wash—this creates a better seal. Also, preheat your oven for at least 15 minutes to ensure even heat distribution.
For extra browning, place a baking sheet under the pie dish to reflect heat upward. A toaster oven works well for this trick too. 🔥
Lumpy Filling
Lumpy filling happens when the flour or cream isn’t fully incorporated. Whisk the flour into the broth before adding it to the skillet to create a smooth roux. For a silky texture, strain the filling through a fine-mesh sieve before assembling.
If you’re short on time, blend the filling briefly with an immersion blender—just don’t overdo it, or you’ll lose the chunky veggies.
Preventing Overfilling
An overfilled pot pie can cause the crust to burst or leak. Fill the crust only ¾ full—this gives the filling room to expand without spilling. If your pot pie looks too full, press down gently on the filling with a spatula before sealing the top crust.
For extra stability, chill the assembled pie for 30 minutes before baking to help the crust hold its shape. ✨
Nutrition facts
Frequently asked questions
Can I make this pot pie with beef instead of chicken?
Swap the chicken thighs for 2 pounds of diced beef (like chuck or stew meat) and brown it thoroughly before adding the vegetables. For extra flavor, sear the beef in batches to render the fat. Use the same filling method, but reduce the cooking time to 8 minutes after adding the broth to prevent overcooking.
How do I make this vegetarian?
Replace the chicken with 1.5 cups of cooked lentils or chickpeas and add 1 cup of mushrooms (sautéed with the onions and celery). Use vegetable broth instead of chicken broth, and consider adding ½ cup of spinach or kale to the filling for extra greens. The texture will be hearty and satisfying!
Can I use frozen Pillsbury pie crust?
Yes, but thaw it completely in the fridge overnight first. If you're short on time, unwrap the frozen crust and let it sit at room temperature for 20-30 minutes before using. Just handle it gently to avoid tearing—it's still delicate when thawed. For best results, keep the crust chilled until ready to assemble.
Why does my crust puff up and then collapse?
This happens when steam builds up too quickly without proper ventilation. To fix it, cut more steam vents (8-10 slits) in the top crust, and avoid overfilling the pie. Also, bake on the middle rack instead of the top—this helps the crust expand evenly without sagging.
Can I make this ahead of time?
This pot pie actually tastes better the next day! Assemble it completely (even with the egg wash), then refrigerate for up to 24 hours before baking. For make-ahead freezing, bake the pie fully, cool completely, then wrap tightly and freeze for up to 3 months. Reheat covered at 350°F for 20-25 minutes.