Desserts
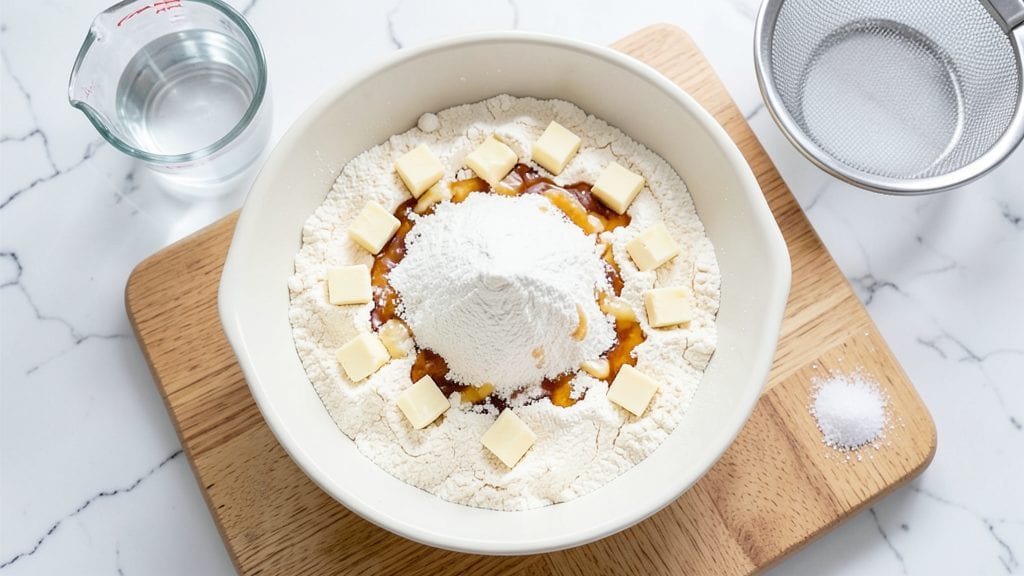
Betty Crocker's basic pie crust recipe delivers the flaky, golden layers that make every pie worth baking. The secret lies in cold butter layers that maintain their structure through baking, creating that signature tender, crisp texture we all crave.
This isn't just any crust—it's the foundation that transforms ordinary fillings into showstopping desserts.
What sets this crust apart is the precise technique of cutting butter into flour using a pastry cutter or your fingers until pea-sized crumbs form. This creates those essential pockets of steam during baking that puff up into delicate layers.
The recipe uses all-purpose flour and cold butter (never melted) to ensure maximum flakiness, while a touch of salt and ice water balances the richness.
By following these steps, you'll achieve a crust that's sturdy enough to hold any filling—whether it's spiced apples, creamy pecans, or pumpkin puree—while maintaining that perfect balance of crisp edges and tender interior. The result is a pie crust so reliable, it'll make you question why you ever bought pre-made.
This versatile crust works for both deep-dish and single-crust pies, and the same method applies whether you're making a classic apple pie or experimenting with savory options. Let's get started on creating the perfect foundation for your next dessert masterpiece.
Ingredients for betty crocker basic pie crust
Five simple ingredients. One golden, flaky crust that's the secret to perfect pies.
| Ingredient | Amount | Notes |
|---|---|---|
| All-Purpose Flour 🌾 | 2 ½ cups | Sifted for light texture |
| Unsalted Butter 🧈 | 1 cup | Cold, cubed, not melted |
| Ice Water 💧 | ⅓ cup | Chilled for binding |
| Kosher Salt 🧂 | ½ tsp | Fine grain preferred |
| Granulated Sugar 🍚 | 1 tbsp | Balances richness |
The butter is non-negotiable here—cold cubes (straight from the freezer) are key. Store-brand butter works fine, but avoid anything with additives. If your butter's too soft, pop it in the freezer for 10 minutes before cutting. For the flour, Bob's Red Mill or King Arthur are my go-tos—they're consistent and sift beautifully. No sifter? Just press the flour through a fine-mesh strainer. The sugar and salt are just flavor boosters—don't skip either, even if the recipe says optional. Pro tip: measure your flour by spooning it into the cup and leveling it off—don't scoop directly from the bag or you'll end up with a dense crust.
No cold butter? Freeze it for 20 minutes in cubes. Short on sugar? A pinch of vanilla extract adds depth without sweetness. The ice water is crucial—room temperature water won't give you that signature flakiness. If you're in a pinch, use club soda instead, but add just a splash. For a savory crust, reduce the sugar to 1 tsp and add 1 tsp dried herbs like thyme or rosemary. The crust doubles as a perfect base for quiches or pot pies too—just skip the sugar entirely for savory applications. And if you're nervous about handling cold butter, wear gloves—they make the process way easier.
This dough keeps for up to 2 days in the fridge, wrapped tightly in plastic. For longer storage, freeze the dough balls for up to 3 months—thaw in the fridge overnight before rolling. The crust reheats beautifully too—just bake at 375°F for 10 minutes to crisp it up. I always make an extra crust and freeze it for those last-minute pie emergencies. And if you're feeling fancy, brush the baked crust with egg wash for that golden finish. Trust me, it's worth the extra minute.
Why You'll Love This Recipe
- No Fuss, No Mess: I swear by this crust—just mix cold butter into flour until it looks like wet sand, then splash in ice water. No food processor, no stress, and no greasy fingers from overworking it. The secret’s in the ice water: keeps the butter from melting and gives you that perfect flaky texture without the fuss.
- Buttery Crisp Magic: That cold butter cut into the flour? It’s the star. When baked, it creates layers so crisp they shatter like autumn leaves, while the sugar just adds this subtle caramelized sweetness that makes apple pie taste like a hug. Honestly, I’ve tried store-bought crusts, but this one? It’s the real deal.
- Weeknight to Holiday: This crust is my go-to for everything—weeknight pot pies, holiday pecan pies, or even a quick cheesecake crust. The beauty? It’s foolproof enough for a first timer but still impressive enough for guests. Between us, I’ve even used it for savory galettes when I was too tired for dessert.
- Pantry Staple Power: Five ingredients, none of them fancy. You’re probably already using them. That means no last-minute grocery runs, no wasted leftovers (it freezes like a dream), and a crust that costs pennies compared to the pre-made kind. Plus, the kosher salt? It makes all the difference—salty enough to balance sweet fillings but not overpowering.
Step-by-step instructions for Betty Crocker's basic pie crust recipe
Cold butter is the secret to that perfect flaky texture—here's how to handle it right.
Cut the Cold Butter into the Flour
Start by sifting the 2.5 cups all-purpose flour into a large bowl to aerate it and remove any lumps. This makes the crust lighter and easier to work with. Add the 1 cup unsalted butter, still cold and cubed—don't skip the cubing! I like to use a sharp knife to cut the butter into ¼-inch cubes so they melt evenly during baking.
Using a pastry cutter or two forks, cut the butter into the flour until the mixture resembles coarse crumbs with pea-sized butter pieces. You want to keep as much surface area exposed as possible—this creates those signature flaky layers. Work quickly but don't rush; you're aiming for even distribution without melting the butter. If the mixture starts to look like wet sand, it's too warm—pop it in the fridge for 5 minutes to firm up again.
Add Wet Ingredients and Mix Just Until Combined
In a separate small bowl, whisk together the 0.33 cup ice water, 0.5 tsp kosher salt, and 1 tbsp granulated sugar. The ice water is crucial—it keeps the butter cold longer and helps bind the dough without making it tough. Slowly sprinkle this mixture over the flour-butter mixture while gently stirring with a fork.
Here's where things get tricky: you want just enough water to hold the dough together when pressed, but not so much that it becomes sticky. I usually add about ⅔ of the water first, mix well, then add the rest as needed. Press the dough together lightly—it should hold when you squeeze it, but still feel slightly crumbly. If it's too dry, add 1 teaspoon more ice water; if too sticky, chill for 10 minutes before proceeding.
Divide, Shape, and Chill the Dough
Turn the dough out onto a lightly floured surface and divide it into two equal pieces (about 1¼ cups each). Gently shape each piece into a disk about 6 inches wide and ½ inch thick. Wrap each disk tightly in plastic wrap and refrigerate for at least 1 hour—this resting period relaxes the gluten and prevents shrinking during baking.
I know it's tempting to skip chilling, but don't. The longer you chill (up to 24 hours), the better the texture. When you're ready to roll, unwrap one disk and place it on a floured surface. Using a rolling pin, roll it out to about 12 inches in diameter, keeping it as round as possible. The edges will naturally thicken as you roll—this is normal. If the dough starts to stick, sprinkle more flour, but don't overdo it or the crust will be tough.
Transfer and Blind-Bake (If Needed)
Carefully transfer the rolled-out dough to your pie dish, gently shaping it to fit the bottom and sides. Trim any excess dough hanging over the edge with kitchen shears. For a classic double-crust pie, repeat with the second disk. If you're making a single-crust pie, fold the top edge under itself to create a rim.
For a pre-baked crust (like for pumpkin or custard pies), line the bottom with parchment paper, fill with pie weights or dried beans, and bake at 375°F for 15 minutes. Remove the weights and bake another 5-10 minutes until the edges are light golden brown. The crust is ready when it holds its shape and doesn't sag when touched. For filled pies, you can skip blind-baking and fill immediately—just make sure the filling is hot enough to melt the butter and create that perfect seal.
Bake Until Golden and Crisp
Whether you're baking a filled pie or using the crust as a base, preheat your oven to 375°F. For filled pies, place the dish on the lower oven rack to prevent the top crust from browning too quickly. Bake until the crust is deep golden brown and the filling is bubbly—usually 45-60 minutes, but timing varies by filling.
The key to a flaky crust is controlling the baking time. If the edges brown too quickly, tent loosely with foil. For the best texture, let the pie cool for at least 2 hours before slicing—this gives the filling time to set and the crust time to firm up. The result should be a crust that's crisp on the outside but tender on the inside, with those beautiful flaky layers that make every bite worth it.
Pro Tips For Making Betty Crocker Basic Pie Crust
- Cut Butter into Pea Sizes: The Betty Crocker recipe calls for cold butter, but don’t just eyeball it—cut those chunks into uniform pea-sized pieces. Smaller pieces mix faster without melting, and you’ll end up with flaky layers instead of a tough, greasy mess. (Yes, even if you’re impatient like me, resist the urge to rush this.)
- Use Ice Water, Not Cold: Ice water is non-negotiable here, but don’t just grab the first ice cubes—let them melt slightly in your measuring cup. You want water that’s just below freezing, not a slushie. Too cold, and the flour won’t hydrate properly; too warm, and you’ll end up with a gummy dough. Aim for water that’s cold enough to make you wince when you touch it.
- Skip the Overmixing: This dough is forgiving, but once you add the water, stop mixing the second everything comes together. Two or three quick turns with a fork or your hands is all it takes. Overworking the dough develops gluten, and that’s the fast track to a dense, chewy crust. (I learned this the hard way after making a pie that tasted more like a biscuit.)
- Chill the Dough Longer: The recipe says 30 minutes, but unless you’re in a rush, give it an hour—covered, in the fridge. Cold dough is easier to roll, less likely to shrink, and way less stressful to work with. Pro tip: Divide the dough into two discs, wrap them in plastic, and flatten them slightly. They’ll be ready to roll out without sticking to the counter. (Your future self will thank you.)
Perfect pairings for this betty crocker basic pie crust
Sweet Filling Pairs
This crust is the perfect foundation for classic apple pie—its flaky layers complement the spiced apple filling beautifully. Use Granny Smith and Honeycrisp apples for a balance of tart and sweet.
For a Southern twist, try pecan pie with the crust baked first, then topped with a rich pecan filling. I also love this crust for pumpkin pie, where the buttery texture contrasts wonderfully with the creamy filling. 🍎
Savory Pairing Ideas
Don't limit this crust to desserts! For a savory pot pie, use the crust to encase a hearty chicken and vegetable filling. The same crust works perfectly for quiche Lorraine—just brush it with egg wash before baking.
For a vegetarian option, try a spinach and feta tart with a sprinkle of everything bagel seasoning on top. The crust's versatility makes it ideal for both sweet and savory dishes. 🥧
Cheesecake Base
This crust doubles as an excellent cheesecake base—its sturdy structure prevents cracking while adding a buttery crunch. Press the dough into a 9-inch springform pan and bake at 350°F for 15 minutes before adding your cheesecake filling.
For extra flavor, mix 1 tsp cinnamon into the dough before pressing it into the pan. The crust's flakiness balances the creamy cheesecake perfectly. 🧀
Seasonal Fruit Variations
Swap out the sugar for 1 tbsp cinnamon and use this crust for cherry pie during summer. For fall, try blackberry or blueberry pies—the crust's buttery richness enhances the tartness of the berries.
In winter, a peach pie with a sprinkle of vanilla sugar on top adds a cozy touch. Each seasonal fruit brings a new dimension to the crust's classic flavor. 🍒
Crust for Hand Pies
Divide the dough into 12 equal portions and roll each into a 3-inch circle. Fill with apple, cherry, or berry jam, fold into a half-moon shape, and seal the edges with a fork.
Brush with egg wash and bake at 375°F for 20-25 minutes. These hand pies are perfect for picnics or potlucks—the crust holds up beautifully to filling spills. 🍓
Garnish and Topping Ideas
Before baking, sprinkle the crust with coarse sugar for a sparkling finish or crushed nuts for texture. For a lattice top, cut the second crust into strips and weave them together.
After baking, drizzle with caramel sauce or honey for extra sweetness. A dusting of powdered sugar adds a professional touch to any pie. 🌟
Nutrition facts
Frequently asked questions
Why does this crust need cold butter?
The cold butter creates those signature flaky layers by melting slowly during baking. When butter stays solid until the oven heats up, it creates steam pockets between the flour layers, puffing up into delicate, crispy sheets. Using warm butter would make the crust dense and tough instead.
Can I make this crust without a food processor?
Just use two forks or your fingers to cut the butter into the flour until you get pea-sized crumbs. Work quickly to keep everything cold, and don't overmix once the water is added. The key is even distribution—not perfection.
What if my crust turns out too tough?
Overworking the dough or using warm butter usually causes toughness. For next time, chill the dough longer (up to 24 hours), use less water, and handle it gently. If it's already made, brush the baked crust with melted butter and bake for another 5 minutes to restore some flakiness.
How do I prevent a soggy bottom in my pie?
Pre-bake the crust for 15 minutes with pie weights before adding filling, or brush it with egg wash after baking. For custard pies, always pre-bake. The crust should be fully set before adding wet fillings. A hot filling can also help—pour it into the crust while hot to melt the butter and create a seal.
Can I freeze the dough for later use?
Yes! Shape the dough into disks, wrap tightly in plastic, and freeze for up to 3 months. Thaw in the fridge overnight before rolling. For best results, let it sit at room temperature for 10 minutes after thawing to make it more pliable.