
Desserts
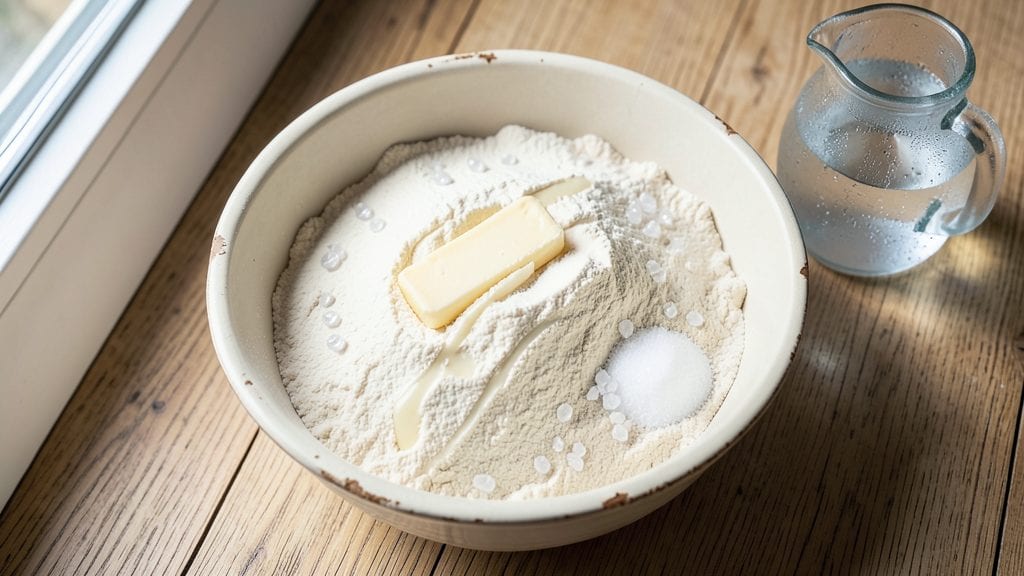
Grandma's perfect pie crust recipe is the foundation every home baker needs to master—flaky, golden layers that hold their shape through baking. I first learned this method from Mrs. Henderson in Cincinnati, where we'd spend autumn afternoons rolling dough while her kitchen filled with the scent of cinnamon.
The secret lies in cold butter and gentle handling, techniques that transform simple ingredients into something extraordinary.
This recipe delivers a foolproof crust that works for both sweet and savory pies, quiches, or tarts. With just five ingredients and 20 minutes of hands-on time, you'll create layers so delicate they practically melt in your mouth.
The key is keeping everything cold—flour, butter, even your hands—so the butter stays in perfect little sheets when it bakes.
By the time you slide your pie into the oven, you'll have a crust that's golden brown at the edges and tender in the center, with just enough crispness to hold any filling.
The aroma alone will have everyone gathering in the kitchen, and the first bite will prove why this crust is worth perfecting. Let's get started with the steps that have been passed down through generations.
Whether you're making classic apple pie or a rich beef Wellington, this crust adapts beautifully to any filling. The same method works for both blind-baked crusts and filled pies—just adjust the baking time.
Once you master this technique, you'll never buy store-bought crust again. Here's everything you need to know to achieve perfect results every time.
Ingredients for grandma's perfect pie crust
Five simple ingredients transform into golden, flaky layers that hold any filling perfectly.
| Ingredient | Amount | Notes |
|---|---|---|
| All-Purpose Flour 🌾 | 2 ½ cups | Sifted for light texture |
| Unsalted Butter 🧈 | 1 cup | Cold, cubed, not softened |
| Ice Water 💧 | ⅓ cup | Chilled, for binding |
| Diamond Crystal Kosher Salt 🧂 | ½ tsp | Fine grain preferred |
| Granulated Sugar 🍚 | 1 tbsp | For tenderizing crust |
The butter is non-negotiable here—you want European-style unsalted butter like Plugrá or Briefer for maximum flavor and flakiness. Grab it from the grocery store's butter case and let it chill in the fridge for at least 2 hours before using. Cold butter creates those perfect layers when it melts in the oven. For the flour, King Arthur or Gold Medal brands are my go-tos—they're consistent and reliable. If you're in a pinch, Bob's Red Mill works too, but avoid bread flour since it's too strong for pie crust. The ice water is your secret weapon—it keeps the dough from sticking and helps bind the mixture without overworking it.
No ice water? Freeze a small ice cube tray for 10 minutes to chill regular water. Short on butter? Lard or shortening can work, but you'll lose that rich, buttery flavor. Using salted butter? Skip the extra salt—this crust is delicate enough. The sugar might seem odd, but it tenderizes the crust and balances the salt. If you're making a savory pie, you can cut it to half a tablespoon or omit it entirely. For extra flakiness, try freezing the butter-flour mixture for 20 minutes before adding water. And if your dough feels too dry, add 1 teaspoon more ice water at a time until it just holds together.
Wrap the dough tightly in plastic wrap and refrigerate for at least 1 hour—this relaxes the gluten and prevents shrinking. The dough can stay in the fridge for up to 48 hours, making it perfect for meal prep. For longer storage, freeze the dough between parchment paper for up to 3 months. When ready to use, let it sit at room temperature for 10-15 minutes before rolling. The crust reheats beautifully—just bake it at 375°F for 10-12 minutes until golden. Leftovers? Store in an airtight container for 3 days or freeze for 2 months.
Why You'll Love This Recipe
- Butter’s Secret Weapon: That cold, cubed butter cut into the flour? It’s not just a step—it’s the magic. The flakes melt into pockets of golden, flaky layers that make every bite worth the effort. (Yes, even when you’re too tired to roll it out perfectly.)
- Cold Water Confidence: Ice water isn’t just a trick—it’s the shortcut I swear by. No waiting for dough to rest, no sticky messes. Just toss, knead, and chill. My hands stay clean, and the crust holds together like it’s been baked for hours.
- Pie for Any Moment: This isn’t just for Thanksgiving. Use it for hand pies on a Tuesday, pot pie when it’s cold, or even a savory tart when you’re craving something different. The same dough, endless possibilities—no excuses.
- Pantry Goldmine: Five ingredients, zero specialty items. You already have them. That sugar? It’s not just for sweetness—it tenderizes the crust so it’s crisp but never tough. Budget-friendly, foolproof, and always delivers.
Step-by-step instructions for grandma's perfect pie crust
Here's how to create that legendary flaky, golden crust that stays crisp through every bite.
Mix Dry Ingredients for Light Texture
In a large bowl, combine the 2.5 cups all-purpose flour, 1 tablespoon granulated sugar, and ½ teaspoon diamond crystal kosher salt. I always use a whisk for this step to ensure no lumps remain—those can create tough spots in your crust. Sift the flour first if you're feeling fancy, but even just whisking vigorously works wonders for a light, airy texture.
This dry mix is your foundation. The sugar isn't just for sweetness—it tenderizes the gluten, giving you that perfect balance of flakiness and structure. Keep the bowl nearby as we'll add the cold butter next without letting it warm up.
Cut in Cold Butter Until Pea-Sized
Add the 1 cup cold cubed butter to the flour mixture. Using a pastry cutter or your fingers (yes, your fingers!), work the butter into the flour until you have pea-sized crumbs. This is crucial—you want the butter to stay cold and in chunks, not melt into the flour. If the butter starts to soften, chill the bowl in the freezer for 5 minutes to reset the temperature.
Press down on the mixture occasionally to help break up any large butter pieces. You're aiming for a texture that resembles coarse sand or wet sandpaper. Don't overwork it—just until the butter is evenly distributed. This cold butter will create those beautiful flaky layers when it melts during baking.
Add Ice Water Gradually for Binding
Measure out the ⅓ cup ice water—this chilled liquid is key to binding your crust without making it tough. Sprinkle about 1 tablespoon at a time over the flour-butter mixture, gently tossing with a fork after each addition. Be patient here—you want just enough moisture to hold the crust together when you roll it out, but not so much that it becomes sticky.
After adding all the water, use your hands to gently bring the mixture together. It should form a shaggy dough that's just cohesive enough to handle. If it's too dry, add another teaspoon of water. If it's too sticky, sprinkle in a little more flour. The dough should be cold to the touch—this prevents the butter from melting prematurely.
Chill the Dough for Easy Handling
Divide the dough into two equal discs (about 1½ cups each) and flatten them into 4-inch rounds. Wrap each tightly in plastic wrap and refrigerate for at least 1 hour. This chilling step is non-negotiable—it relaxes the gluten, prevents shrinking when you roll it out, and keeps the butter beautifully cold for maximum flakiness.
While the dough chills, preheat your oven to 375°F. This might seem early, but you'll want it fully heated by the time you're ready to blind-bake your crust. The cold dough will warm up quickly once you start working with it, so having the oven ready ensures you can get your pie into the oven without delay.
Roll and Transfer for Perfect Shape
On a lightly floured surface, roll one disc into a 12-inch circle about ⅛-inch thick. I use a rolling pin, but I keep it moving constantly to prevent the dough from warming up. If the edges start to get too soft, return the dough to the fridge for 10 minutes to firm up.
Gently fold the crust in half and then in half again to make handling easier. Transfer it to your pie dish by carefully unfolding it. Press the dough lightly into the bottom and up the sides, being careful not to stretch it. Trim any excess dough hanging over the edge with a sharp knife. The crust should sit comfortably in your dish without being forced.
Blind-Bake for Structural Perfection
Line the crust with parchment paper and fill it with pie weights or dried beans. Bake at 375°F for 15 minutes, then remove the weights and bake for another 5-7 minutes until the edges are lightly golden. This blind-baking step prevents a soggy bottom when you add your filling later—it creates a sturdy foundation that holds up beautifully.
Remove the crust from the oven and let it cool slightly. The edges should be just set but still flexible. If you're adding a filling now, proceed carefully. If you're prepping ahead, you can store the baked crust at room temperature until ready to use. This crust will stay crisp for days, making it perfect for both sweet and savory pies.
Pro Tips For Making Grandma'S Perfect Pie Crust
- CHILL THE BUTTER FIRST: Pull your unsalted butter from the fridge and let it sit for 10-15 minutes before cutting—it should be soft enough to press with a finger but not greasy. I learned this the hard way after fighting with dough that refused to hold together because the butter was too cold (or worse, melted into a mess).
- WEIGH YOUR FLOUR: Skip the scooping and use a kitchen scale for the all-purpose flour—1 cup packed in a standard measuring cup can actually be 150g or more, throwing off your ratio. My grandmother measured by volume, but I now weigh everything for consistency, especially when making two crusts.
- WORK FAST WITH ICE WATER: Keep your ice water in the freezer until you’re ready to add it—this prevents the butter from melting too quickly when mixed. I used to let it sit out, and the dough would turn gummy faster than I could roll it out.
- PRESS OUT AIR BUBBLES: After rolling the dough, press it into the pie dish with your fingertips—not the rolling pin—to smooth out any air pockets or cracks. This isn’t the prettiest method, but it guarantees a clean, even crust that won’t shrink during baking. (Yes, even if you’re impatient like me.)
Pro cooking tips for this recipe
Butter Temperature Matters
Your crust's flakiness hinges on cold butter—never softened or melted. I cube 1 cup unsalted European-style butter (like Plugrá) and freeze it for 10 minutes before using. This ensures it stays firm when cutting into the flour.
If your kitchen runs warm, chill the bowl in the freezer for 5 minutes between steps to maintain that crucial cold temperature. 🌡️
Finger Cutting for Flakiness
Skip the food processor for maximum flakiness—I use my fingers to work the cold butter into the flour until pea-sized crumbs form. This manual method creates more surface area for those golden layers.
Press down occasionally to break up any large butter pieces. If the mixture feels too warm, return it to the fridge for 10 minutes before continuing.
Ice Water Binding
Chilled water is your secret weapon for binding without toughness. Measure ⅓ cup ice water (freeze a small tray for 10 minutes if needed) and add it 1 tablespoon at a time.
The dough should hold together when pressed but still feel cold to the touch. If it's too sticky, add 1 teaspoon flour—but don't overdo it, or you'll lose flakiness. 💧
Chill Time Prevents Shrinking
Never skip the 1-hour chill before rolling. This relaxes the gluten and prevents the crust from shrinking when it hits the oven. Wrap the dough tightly in plastic and refrigerate it flat rather than rounded.
Pro tip: Place a small weight on top to maintain the disc shape. The longer it chills (up to 48 hours), the better the texture.
Rolling Technique for Even Thickness
Roll from the center outward in one direction to prevent uneven thickness. Keep the dough moving constantly to avoid warming. For extra flakiness, freeze the rolled crust for 15 minutes before transferring to the pie dish.
I use a 12-inch rolling pin and keep my hands floured but not powdered—just enough to prevent sticking without adding excess flour.
Blind-Baking Secrets
Prevent soggy bottoms by blind-baking with pie weights or dried beans. Bake at 375°F for 15 minutes, then remove weights and bake 5-7 more minutes until edges are golden.
For a crispier crust, brush the bottom with 1 tablespoon melted butter before blind-baking. This creates a beautiful, flaky base that holds any filling—sweet or savory—perfectly. 🍂
Nutrition facts
Frequently asked questions
Why does my pie crust turn out tough instead of flaky?
Overworking the dough or using warm butter are the most common culprits. Always keep everything cold—flour, butter, even your hands—and work quickly. The butter should stay in pea-sized chunks when mixed with flour, not disappear completely. If your dough feels sticky, add just 1 teaspoon flour at a time rather than overcompensating.
Can I make this crust ahead of time?
The dough can be refrigerated for up to 48 hours or frozen for 3 months between layers of parchment. For best results, let it sit at room temperature for 10-15 minutes before rolling. Pre-baked crusts can be stored at room temperature for 3 days or frozen for 2 months—just reheat at 375°F for 10-12 minutes before adding filling.
What's the difference between this crust and store-bought?
Homemade crust has 50% more butter (1 cup vs. ½ cup in most store versions) and no preservatives, giving it superior flakiness and flavor. Plus, you control the ingredients—no mystery oils or fillers. For savory pies, this crust stays crisp longer than frozen versions that often turn soggy. The secret is the ice water binding method, which creates a lighter texture than commercial doughs.
Can I use this crust for savory dishes like quiche?
This recipe works perfectly for both sweet and savory pies! For quiche, reduce the sugar to ½ tablespoon or omit it entirely. The high butter content creates a rich, crisp base that holds up beautifully to custard fillings. Blind-bake the crust fully before adding the egg mixture to prevent a soggy bottom.
What if my crust shrinks when baking?
Shrinking usually means the dough wasn't chilled long enough or was handled too much. Always refrigerate the dough for at least 1 hour before rolling, and keep it cold while working. When transferring to the pie dish, don't stretch the edges—press gently and trim excess instead. For extra insurance, freeze the rolled crust for 15 minutes before baking.