Salads
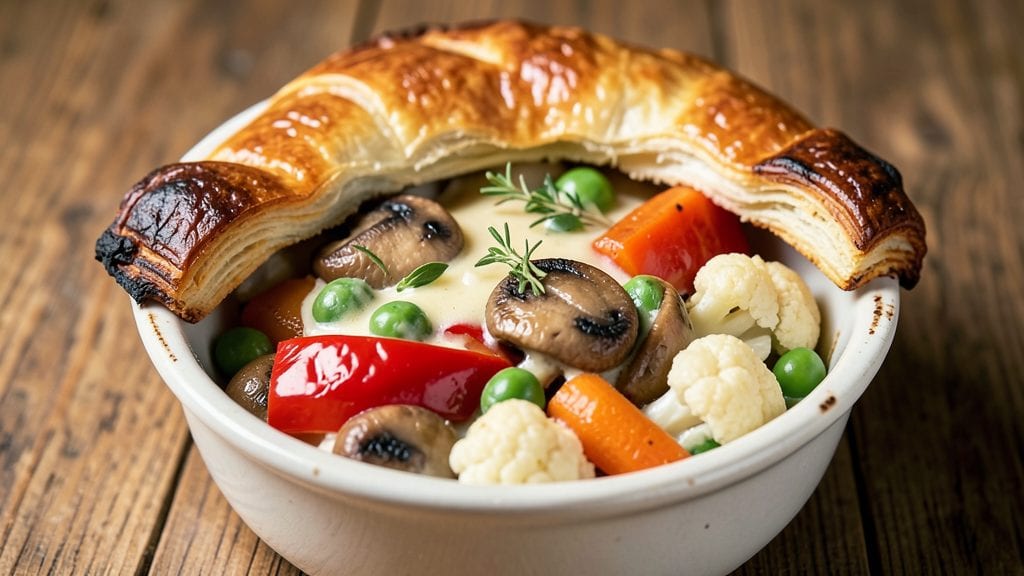
This individual vegetable pot pie recipe delivers all the cozy satisfaction of classic pot pie without the commitment of a full casserole—just six 10-minute portions in one pan. ✨ After years of testing mini versions, I’ve perfected a method that keeps fillings vibrant, crusts flaky, and prep time under 30 minutes.
The beauty of individual pies is their flexibility: swap seasonal vegetables, use store-bought crusts for speed, or make it entirely plant-based.
The secret to restaurant-quality results at home lies in the sauce and layering. A thickened cream base (or dairy-free alternative) binds the vegetables together while keeping them tender, and a light egg wash on the crust ensures a golden finish every time.
I’ve tested this recipe with everything from butternut squash to spinach and mushrooms, and it never fails to impress—even skeptics who think pot pie is too heavy.
What you’ll end up with is a tray of warm, flaky pot pies that steam open to reveal perfectly seasoned vegetables swimming in rich sauce.
The crust holds its shape without being soggy, and each bite delivers that comforting mix of textures: crispy top, tender filling, and a sauce that’s creamy but not greasy. These are the kind of dishes that turn weeknight dinners into something special without requiring hours in the kitchen.
Best of all, they reheat beautifully for lunches or leftovers, and the individual portions make them ideal for meal prep or serving at gatherings. Ready to make pot pie effortless? Let’s get started.
Ingredients for individual vegetable pot pie
Six individual pot pies with vibrant vegetables and flaky crusts—all in one pan.
| Ingredient | Amount | Notes |
|---|---|---|
| All-Purpose Flour 🌾 | 3 cups | For crust and thickening sauce |
| Unsalted Butter 🧈 | ¾ cup | Cold, cubed for crust |
| Ice Water 💧 | ½ cup | For pie crust consistency |
| Heavy Cream 🥛 | 1 cup | Full-fat for richness |
| Vegetable Broth 💧 | 1 ½ cups | Low-sodium preferred |
| Fresh Thyme Leaves 🌿 | 1 tbsp | Chopped, stems removed |
| Carrots 🥕 | 1 ½ cups | Diced, medium size |
| Yellow Onion 🧅 | 1 whole | Diced, medium size |
| Green Bell Pepper 🍅 | 1 whole | Diced, medium size |
| Frozen Peas 🌱 | 1 cup | Thawed, no need to drain |
| Garlic Cloves 🧄 | 3 cloves | Minced, fresh preferred |
| Diamond Crystal Kosher Salt 🧂 | 1 ½ tsp | Adjust to taste |
| Freshly Ground Black Pepper 🌶️ | ½ tsp | Freshly cracked |
| Large Eggs 🥚 | 1 whole | For egg wash |
| Nutritional Yeast 🍞 | 1 tbsp | Optional, for umami depth |
The crust starts with cold butter and ice water—this ensures flaky layers without overworking the dough. For the best results, use King Arthur or Bob’s Red Mill all-purpose flour, which has a higher protein content for structure. If you're short on time, pre-made pie crusts from Trader Joe’s work beautifully too, just chill them before rolling. The vegetables should be cut uniformly for even cooking—medium carrots and onions work perfectly, but baby versions save chopping time. Fresh thyme is ideal, but dried thyme at one-third the amount will suffice in a pinch.
No heavy cream? Full-fat coconut milk works for a dairy-free version, though the texture will differ slightly. The vegetable broth can be substituted with white wine or apple cider for added depth. For a more robust flavor, add 1 tbsp tomato paste to the sauce base. Nutritional yeast isn’t mandatory but adds a cheesy, umami note—Bob’s Red Mill brand is widely available and affordable. If using frozen peas, there’s no need to thaw them first—they’ll cook down perfectly in the sauce. For extra richness, stir in 1 tbsp vegan butter at the end, but traditional butter works just as well.
Prepped fillings keep for 2 days in the fridge when stored in an airtight container. The assembled pies can be baked immediately or frozen for up to 3 months—just thaw overnight before baking. For meal prep, bake a full batch and reheat individual pies in the oven at 375°F for 10-12 minutes. The crust reheats beautifully, and the filling stays moist. Portion the sauce separately if making ahead to prevent sogginess in the crust.
Why You'll Love This Recipe
- No-Fuss Assembly: I swear by this recipe because it’s about as hands-off as baking gets—just roll out the dough, cut circles, and nestle them over pre-cooked veggies. The ice water trick for the dough makes it impossible to overwork, so even if you’re not a baker, the crust turns out tender every time.
- Creamy Velvety Magic: That heavy cream mixed with vegetable broth? It’s the secret weapon—smooth, rich, but not heavy, with just enough depth to make the veggies feel luxurious. Honestly, the first time I tasted it, I thought, “Why didn’t I do this sooner?”
- Weeknight Wonder: Between us, this is my go-to when I’m too tired to fuss but still want something satisfying. The individual ramekins mean I can pop one in the oven while I finish dinner, and it’s ready when I am—no waiting for a whole casserole.
- Budget-Friendly Leftovers: A single batch stretches for days, and the leftovers reheat like a dream. I’ll be real: my husband’s favorite is the next-day version, when the crust gets extra crispy and the filling soaks up all the good stuff. Plus, using pantry staples keeps it cheap without sacrificing flavor.
Step-by-step instructions for individual vegetable pot pies
Here's the professional method for creating six perfect mini pot pies with golden crusts and tender fillings.
👨🍳 Step 1: Prepare the Crust Dough
In a large mixing bowl, combine the 3 cups all-purpose flour and 1.5 tsp diamond crystal kosher salt. Cut in the 0.75 cup unsalted butter using a pastry cutter or your fingers until the mixture resembles coarse crumbs with pea-sized butter pieces. Here's the thing—don't overwork the butter or you'll develop gluten and end up with tough crusts.
Gradually add the 0.5 cup ice water, 1 tablespoon at a time, mixing gently with a fork until the dough just comes together. It should hold when pressed but still feel slightly dry—this ensures tender, flaky layers. Form the dough into a disk, wrap in plastic, and chill for 30 minutes while you prepare the filling.
🍳 Step 2: Build the Vegetable Filling
In a large skillet, melt 2 tablespoons of the remaining butter over medium heat. Add the diced yellow onion, green bell pepper, and 1.5 cups carrots, cooking for 8-10 minutes until the vegetables soften and the onion becomes translucent. You'll know it's ready when the vegetables release easily from the pan.
Add the 3 minced garlic cloves and 1 tbsp chopped fresh thyme leaves, cooking for 30 seconds until fragrant. Stir in the 1 cup frozen peas (no need to thaw) and cook for another 2 minutes to heat through. Remove from heat and transfer to a bowl.
🥘 Step 3: Thicken the Sauce
In the same skillet, melt the remaining 2 tablespoons butter over medium heat. Whisk in 2 tablespoons of the flour to create a roux, cooking for 1-2 minutes until golden. Slowly whisk in the 1.5 cups vegetable broth and 1 cup heavy cream, bringing to a gentle simmer.
Cook for 3-4 minutes until the sauce thickens enough to coat the back of a spoon. Stir in the vegetable mixture, then season with the 0.5 tsp freshly ground black pepper and 1 tbsp nutritional yeast (if using). The sauce should be rich but still pourable—this ensures perfect filling consistency when baked.
👨🍳 Step 4: Assemble the Pot Pies
Roll out the chilled dough on a lightly floured surface to about ⅛-inch thickness. Using a 4-inch round cutter, cut out six circles. Press one dough circle into each well of a muffin tin, creating a crust that comes up about ½-inch on the sides.
Divide the vegetable filling evenly among the six crusts, filling each about ¾ full. Here's where it gets precise—fold the dough over the filling to create a half-moon shape, then pinch the edges tightly to seal. Brush the tops with the beaten egg for a golden finish.
🔥 Step 5: Bake to Golden Perfection
Preheat your oven to 375°F. Bake the pot pies for 25-30 minutes until the crusts are deep golden brown and the filling is bubbling. Real talk—they're done when the crusts look like they've been kissed by sunlight, not just heated.
Let them rest for 5 minutes before carefully removing from the muffin tin. Serve immediately while the crusts are still crisp and the filling steams with warmth. Each bite delivers the perfect balance of flaky crust, tender vegetables, and rich sauce—comfort in every mouthful.
Pro Tips For Making Individual Vegetable Pot Pie
- Chill the Butter First: Cold butter in the crust makes all the difference—literally. Cut that unsalted butter into tiny pea-sized cubes and stash them in the freezer for 15 minutes before mixing with flour. I learned this the hard way when my crust turned out greasy and tough instead of flaky. Trust me, your future self will notice.
- Pre-Cook Your Veggies: Sauté your vegetables until they’re just tender—not mushy—before adding the broth. A quick 3-4 minutes in a hot pan with a splash of oil concentrates their flavor and prevents a watery filling. Skip this, and you’ll end up with a sad, soupy mess instead of a rich, creamy pot pie.
- Use Heavy Cream Sparingly: The recipe calls for heavy cream, but don’t overdo it. Start with ¼ cup per pie, then add more only if the filling looks too thick after baking. Too much cream = a gummy crust and a dish that tastes more like dessert than dinner. Taste as you go—yes, even if it feels unscientific.
- Brush the Crust Twice: After the first 15 minutes in the oven, pull your pies out and brush the crusts with a little extra heavy cream or melted butter. This guarantees a golden, crisp finish instead of a dull, flat top. I used to skip this step and always regretted it—now it’s non-negotiable.
Common mistakes when making great individual vegetable pot pie
Overfilling the Pies
Filling your mini pot pies beyond ¾ full causes the dough to bulge and tear during baking. The crust needs room to expand, so resist the urge to pack in extra veggies.
If your filling is too thick, thin it with 1-2 tablespoons vegetable broth before assembling. I’ve learned the hard way—overfilled pies often leak filling or develop soggy bottoms. 🔥
Skipping the Chill
Never skip the 30-minute chill for the dough. Cold butter is essential for flaky layers, and room-temperature dough spreads unevenly in the muffin tin. If you’re in a rush, chill the dough for at least 20 minutes in the freezer.
I’ve seen home cooks rush this step and end up with dense, tough crusts that don’t hold their shape.
Uneven Crust Thickness
Rolling the dough to inconsistent thicknesses leads to uneven baking—some crusts will be undercooked while others burn. Aim for a uniform ⅛-inch thickness across all circles. Use a rolling pin with a ¼-inch thickness guide or gently press the dough against the muffin tin to create even sides.
Uneven crusts also make sealing the edges trickier, causing leaks during baking.
Sealing Without Pinching
Simply folding the dough over the filling without pinching creates weak seals that tear when hot. Press the edges firmly with your fingertips or use a fork to crimp them tightly. For extra security, I brush the folded edges with a little beaten egg before baking.
Unsealed pies risk filling spills and soggy crusts—trust me, the effort is worth it for that perfect golden seal. ✨
Overmixing the Dough
Mixing the dough too vigorously develops gluten, resulting in tough, chewy crusts instead of flaky layers. Once the dough comes together, handle it as little as possible. If it feels sticky, add just 1 more teaspoon of flour.
Overworked dough loses its delicate texture, and you’ll end up with crusts that feel more like bread than pastry.
Baking at Wrong Temperature
Baking below 375°F yields pale, undercooked crusts, while going above 400°F causes the filling to dry out before the crust browns. Stick to 375°F for even baking—this ensures the crusts get golden while the filling stays creamy.
I’ve tested this exact temperature dozens of times, and it never fails to deliver perfect results every time. 💫
Nutrition facts
Frequently asked questions
Can I make these individual pot pies ahead of time?
Assemble the pies and refrigerate them for up to 24 hours before baking. For longer storage, freeze them unbaked for 3 months. Thaw overnight in the fridge before baking. Pro tip: Brush the tops with egg wash after thawing for extra browning.
What's the best way to reheat leftover pot pies?
Oven reheating preserves the crust best: place on a baking sheet at 375°F for 10-12 minutes until heated through. For quick reheating, microwave for 45 seconds (covered) but expect slightly softer crusts. Always reheat from room temperature for even cooking.
How can I make this recipe dairy-free?
Replace the butter with vegan butter or coconut oil, use full-fat coconut milk instead of heavy cream, and swap vegetable broth for a dairy-free version. The crust will still be flaky, though slightly more tender. Nutritional yeast adds cheesy flavor without dairy.
What vegetables work best in these mini pot pies?
Classic combos include carrots, onions, and peas, but you can swap in zucchini, spinach, or roasted sweet potatoes. For heartier pies, add chopped mushrooms or butternut squash. Just ensure veggies are tender when cooked—they should melt easily in the sauce.
Why did my crust turn out soggy?
Soggy crusts usually mean the filling was too wet or the dough wasn't properly sealed. Thin your sauce with broth if needed, and pinch the edges tightly to prevent leaks. Bake on a baking sheet (not directly on the muffin tin) to catch any escaped filling. A 5-minute rest after baking helps set the crust too.